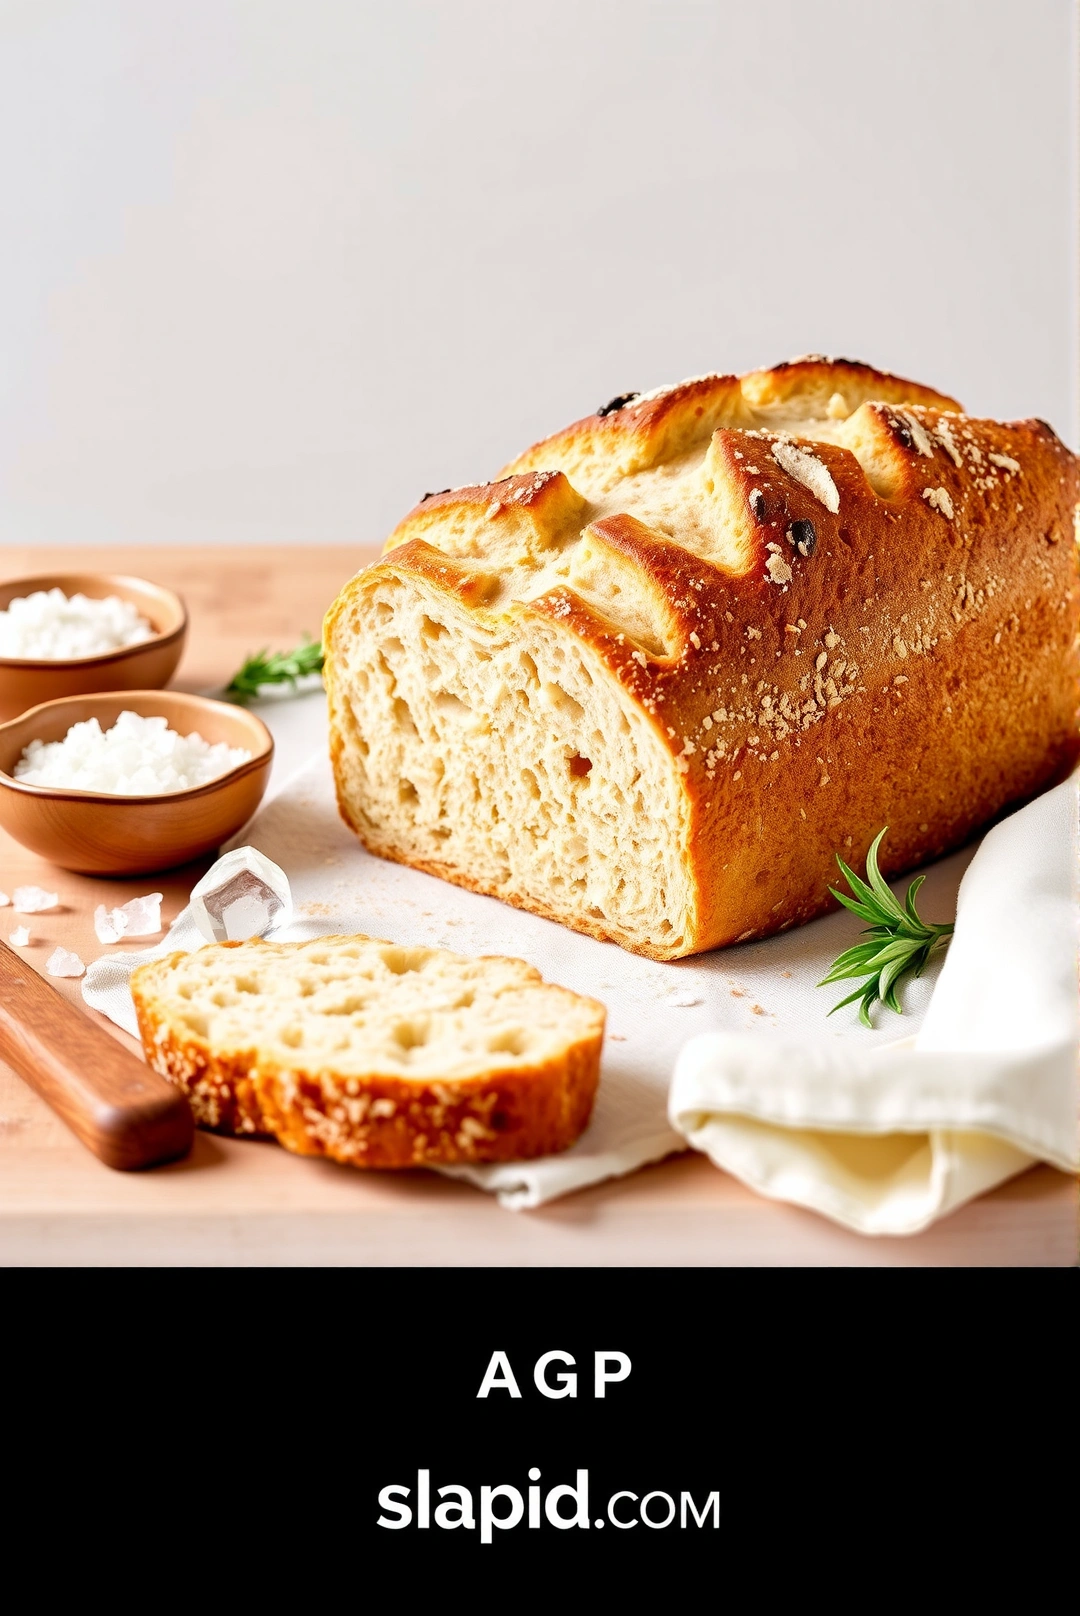
The Sound That Changes Everything
There’s a moment, right after you pull a loaf of bread from the oven, that defines the entire experience. It’s not the visual—the deep, caramel-brown crust with dramatic, artisan-style cracks. It’s not the smell, that intoxicating blend of toasted grain and warm air that fills the entire house. It’s the sound. A gentle, persistent *crackle* that follows the loaf as it cools on a wire rack. It’s the sound of a perfect crust, a symphony of tiny, shattering crisps that promises a phenomenal texture. This is the soundtrack to your new favorite kitchen ritual, the Easy No-Knead Artisan Dutch Oven Crusty Bread. This isn’t just bread; it’s an edible trophy, a masterpiece you made with your own two hands, and the recipe is so deceptively simple, it feels like a magic trick.
This recipe is my secret weapon for rainy Sundays, for unexpected dinner guests, and for those days when I need a tangible win. It requires no fancy equipment, no innate bread-baking talent, and definitely no kneading. The Dutch oven does all the heavy lifting, creating a miniature steamy oven within your oven that gives the loaf its signature crackly shell and open, airy crumb. Forget the dense, brick-like loaves of your past. We’re going for professional bakery quality with the kind of deep, complex flavor that usually takes years to master. It’s the ultimate kitchen confidence booster.
Recommended Product


The Flavor Makers: Your 4-Ingredient Pantry Raid
The beauty of this recipe lies in its minimalist glory. There are no hidden fats, no preservatives, just pure, unadulterated ingredients working in harmony. Each one has a critical job, and when they come together over time, they create something far greater than the sum of their parts. This is the foundation of your future favorite loaf, and you probably have most of it waiting in your pantry right now. The magic isn’t in the complexity of the ingredients; it’s in the patience of the process.
🍳 Used in this recipe
Get It on Amazon Basics✔ Free Delivery | ✔ Top Rated | ✔ Budget-FriendlyHere’s what you need to gather for one magnificent loaf:
* **3 cups (360g) All-Purpose Flour:** The backbone of your bread. It provides structure and a tender crumb. For a chewier texture, you can swap in 1 cup of bread flour, but all-purpose works beautifully.
* **1 ½ teaspoons Fine Sea Salt:** Don’t skip this. Salt does more than just season; it strengthens the gluten network and controls the yeast’s activity for a balanced, flavorful rise.
* **¼ teaspoon Instant Yeast (or Active Dry):** This tiny amount is all you need. The long, slow fermentation is the real hero here, developing flavor without the need for a large yeast quantity. If using active dry yeast, you can mix it directly with the flour—no need to proof it first for this recipe.
* **1 ½ cups (355ml) Warm Water (around 100°F/38°C):** The activator. Warm water wakes up the yeast and brings the dough together. Too hot and you’ll kill the yeast; too cold and it will take forever to rise.
The Science of Patience: Let’s Get Cooking
This is where the recipe transforms from a simple mix of flour and water into a loaf of artisan bread. The process is a slow dance with time. There’s no frantic kneading, no watching the clock like a hawk. Instead, you let time and nature do the work for you. The yeast slowly feasts on the starches in the flour, producing carbon dioxide bubbles that create the bread’s beautiful, airy interior. This slow, cool fermentation is what builds the complex, slightly tangy, wheaty flavor that you can’t get from a quick-rise recipe.
**The Step-by-Step:**
1. **The Combine:** In a large bowl, whisk together the flour, salt, and yeast. Pour in the warm water and use a spatula or wooden spoon to mix until a shaggy, sticky dough forms. There shouldn’t be any dry flour patches. Don’t worry about its messy appearance; it’s supposed to look like this.
2. **The Rise (Part 1):** Cover the bowl with a damp kitchen towel or plastic wrap. Let it sit on your counter at room temperature for 12-18 hours. Yes, hours! Overnight is perfect. You’ll see it become bubbly, more than doubled in size, and develop a lovely, fermented aroma. This is the flavor development stage.
3. **The Prep:** Lightly flour a clean surface and turn the dough out. It will be wet and sticky—this is good. Fold it over on itself once or twice (don’t knead it!) and shape it into a rough ball. Place it on a piece of parchment paper and cover it loosely with the towel. Let it rest for 30 minutes while you preheat your oven.
4. **The Preheat:** Place your Dutch oven (with its lid) into the oven and preheat to 450°F (230°C). This is crucial. The hot pot is the secret to the steamy environment that creates the incredible crust. Let it heat for at least 30 minutes.
5. **The Bake:** Carefully remove the screaming-hot Dutch oven from the oven. Lift the parchment paper with the dough and lower it directly into the pot. Put the lid on and return it to the oven. Bake for 30 minutes with the lid on.
6. **The Crust:** Remove the lid. The loaf will be pale but puffy. Continue baking, uncovered, for another 10-15 minutes until the crust is a deep, gorgeous golden brown. This is where the magic happens.
7. **The Cool Down:** Lift the bread out using the parchment paper and set it on a wire rack. You must let it cool completely before slicing. This is the hardest part, but it’s non-negotiable. Slicing too early traps steam and makes the interior gummy. Listen for that crackle!
🍳 Used in this recipe
Get It on Amazon Basics✔ Free Delivery | ✔ Top Rated | ✔ Budget-FriendlyCommon Pitfalls: How to Avoid Bread Blunders
Even the simplest recipes have their quirks. But don’t worry, these are easy to sidestep. Think of this as your guide to bread-baking bliss, ensuring your first loaf is a triumph, not a tragedy. We’ve all been there, and a few simple tips are all that stands between you and a perfect crust.
* **The “I Used a Non-Stick Pot” Disaster:** Your Dutch oven needs to be oven-safe and, ideally, cast iron. A non-stick pot isn’t designed for the intense, sustained heat of 450°F and can release fumes. Stick to enameled cast iron or bare cast iron for safety and performance.
* **The “Dense Brick” Scenario:** If your bread is heavy and dense, you likely didn’t let it rise long enough, especially during the first 12-18 hour fermentation. Your kitchen temperature affects this. If it’s cold, give it a few more hours. The dough should be bubbly and airy before you shape it.
* **The “Tearing My Hair Out” Sticky Mess:** This dough is wet and sticky. That’s its superpower! Resist the urge to add a ton of extra flour during shaping. Use wet hands or lightly oiled hands to handle it. The parchment paper is your best friend for transferring it to the Dutch oven without a fight.
* **The “Pale, Sad Loaf”:** You skipped the preheat or didn’t leave the lid on long enough. The initial steamy bake with the lid on is what gives the bread its “oven spring” (the dramatic rise in the oven). The final lid-off bake is what develops the color and deepens the crust. Don’t rush either step.
Serving Vibes: Setting the Scene
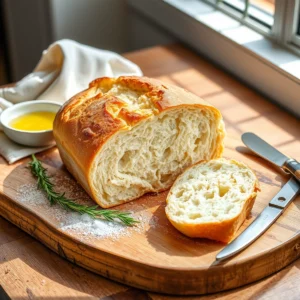
This bread is a chameleon. It can be the star of a cozy, rainy-day lunch, slathered with good butter and a drizzle of honey while you watch the rain streak down the windowpane. The steam rising from its open crumb is pure comfort. It’s the perfect accompaniment to a big, hearty pot of soup or a simple tomato sauce, where its crust is the ideal tool for sopping up every last drop. The contrast of the shattering crust and the soft, chewy interior is a textural masterpiece.
🍳 Used in this recipe
Get It on Amazon Basics✔ Free Delivery | ✔ Top Rated | ✔ Budget-FriendlyRecommended Product
 -11%
-11%
8‑Piece Deep Glass Baking Dish Set with Plastic Lids (Rectangular Bakeware)
- Material: Oven, freezer & microwave safe borosilicate glass (goes from fridge/oven without cracking)
- Pieces →: 4 rectangular dishes + 4 tight‑fitting plastic lids (stackable)
- Easy Care →: Dishwasher safe glass & lids
But it also shines at a gathering. Imagine bringing this still-warm loaf to a potluck, the scent announcing your arrival before you even knock on the door. Tear off a chunk and pass it around—this is bread meant for sharing. It elevates a simple cheese board from a snack to an experience. It’s the foundation for the most incredible grilled cheese, the sidekick to your favorite chili, and the reason you’ll start making excuses to host more dinner parties. It’s rustic, impressive, and deeply satisfying.
Leftovers? Here’s the Plan
It’s a rare problem to have leftover bread with a recipe this good, but if you do, here’s how to keep the magic alive. The crust is the first thing to lose its battle with moisture, so storage is key. Do not, under any circumstances, store it in a plastic bag on the counter, or you’ll have a soft, sad loaf by morning.
For best results, let the bread cool completely, then store it cut-side down on a cutting board for up to two days. This protects the soft interior while keeping the crust crackly. For longer storage, wrap the loaf tightly in a large piece of parchment paper and then a layer of foil. Freeze it for up to three months. To revive it, unwrap and place it directly on the oven rack in a 350°F (175°C) oven for 10-15 minutes. It will come out tasting and sounding like it was just baked. You can also make amazing breadcrumbs or croutons with the leftovers.
🍳 Used in this recipe
Get It on Amazon Basics✔ Free Delivery | ✔ Top Rated | ✔ Budget-FriendlyRecommended Product

Amazon Basics Silicone Baking Mat (2-Pack Non-Stick Oven Liners)
- Material →: Food-safe silicone, reusable thousands of times
- Non-Stick →: No butter, oil, or parchment needed
Your Bread-Baking Questions, Answered
**Can I use whole wheat flour for this Easy No-Knead Artisan Dutch Oven Crusty Bread?**
You can, but it will change the texture and rise. Whole wheat flour absorbs more water and contains bran, which can cut through gluten strands. For best results, start by substituting just ½ cup of the all-purpose flour with whole wheat flour and increase the water by a tablespoon or two. This will give you a heartier flavor without sacrificing too much of that beautiful open crumb.
**How do I get a more sourdough-like tang?**
The long, cool fermentation of this recipe is the first step. To amplify the tang, try letting your dough ferment in the refrigerator for the 12-18 hour period instead of on the counter. The cold slows the yeast down even more, allowing more acidic compounds to develop. This adds a fantastic complexity to the flavor.
**How to freeze Easy No-Knead Artisan Dutch Oven Crusty Bread?**
Freezing is an excellent way to preserve your loaf. The key is to do it while the bread is still fresh. Let it cool completely after baking. You can freeze it whole or sliced. For a whole loaf, wrap it tightly in parchment paper, then a layer of plastic wrap or foil. For slices, separate them with parchment paper and place them in a freezer bag. To thaw, leave it at room temperature for a few hours or reheat directly from frozen in a 350°F oven until warm.
🍳 Used in this recipe
Get It on Amazon Basics✔ Free Delivery | ✔ Top Rated | ✔ Budget-Friendly**What are the calories in Easy No-Knead Artisan Dutch Oven Crusty Bread?**
This is a whole, honest food. A typical slice (assuming one loaf yields about 12 slices) contains approximately 150-180 calories, depending on the exact size. It’s primarily made of flour and water, with minimal other ingredients. It’s a fantastic source of complex carbohydrates for energy. For the most accurate count, you can input the specific ingredients and quantities into a nutrition calculator.
**Why is the bottom of my bread burnt?**
This is a common issue with Dutch oven baking. The pot holds a tremendous amount of heat, which is great for the crust but can sometimes scorch the bottom. Try placing the Dutch oven on a middle rack instead of the bottom one. If you still have issues, you can put an extra baking sheet on the rack below the Dutch oven to diffuse some of the direct heat. Also, ensure you’re not using a higher temperature than recommended.
Easy No-Knead Artisan Dutch Oven Crusty Bread
Ingredients
Ingredients
- 3 cups all-purpose flour plus extra for dusting
- 1 tsp kosher salt fine grain
- 1/2 tsp instant yeast or active dry yeast
- 1.5 cups warm water about 105-110°F