The Warm, Buttery Cloud That Started It All
I remember the first time I truly understood the power of a perfect biscuit. It wasn’t in a fancy restaurant, but in my grandmother’s sun-drenched kitchen on a crisp Saturday morning. The air was thick with the scent of brewing coffee and something else, something magical—a warm, toasty aroma that promised flaky layers and tender crumb. She pulled a tray from the oven, each biscuit a golden, proud little dome, steam curling from their peaks like tiny, edible volcanoes. One bite, and I was hooked: a shatteringly crisp exterior giving way to an interior so soft it practically melted on the tongue, all laced with a gentle, tangy whisper. That, my friends, is the memory I chase with every batch I bake. And today, I’m handing you the map to that same treasure.
Let’s be real. Store-bought biscuits have their place, but they’re a pale imitation of the real thing. This recipe for **Easy Fluffy Homemade Buttermilk Biscuits from Scratch** is your one-way ticket to biscuit nirvana. We’re talking about a recipe that requires zero fancy equipment, just a handful of everyday ingredients you likely have right now. The beauty lies in its simplicity and the incredible, almost shocking, payoff. Each biscuit is a testament to the fact that the best things in life are often the most straightforward. This isn’t just food; it’s a warm, edible hug that makes everything right with the world. Ready to become a biscuit hero?
Recommended Product

Amazon Basics Silicone Baking Mat (2-Pack Non-Stick Oven Liners)
- Material →: Food-safe silicone, reusable thousands of times
- Non-Stick →: No butter, oil, or parchment needed
The Alchemy of Buttermilk: Your Secret Weapon
Before we even touch a mixing bowl, let’s talk about the star of the show. Buttermilk isn’t just a tangy liquid; it’s a kitchen alchemist. Traditionally, it’s the cultured leftover from churning butter, but today we use its modern, consistently tangy cousin. This acidity is your best friend in biscuit-making. It reacts with the baking soda in the recipe, creating a powerful gas bubble explosion that lifts your dough into lofty, airy layers. Think of it as a natural, flavor-infused leavening booster.
🍳 Used in this recipe
Get It on Amazon Basics✔ Free Delivery | ✔ Top Rated | ✔ Budget-FriendlyBut its magic doesn’t stop there. That gentle tang cuts through the richness of the butter, preventing the biscuits from tasting heavy or one-note. It tenderizes the gluten in the flour, resulting in that melt-in-your-mouth crumb we all crave. And here’s a pro tip: if you find yourself out of buttermilk, you can create a fantastic substitute by adding a tablespoon of white vinegar or lemon juice to a cup of regular milk. Let it sit for five minutes, and you’ve got the acidic magic you need. The science of this simple ingredient is what elevates a good biscuit to an unforgettable one.
What You Need to Raid From the Pantry
Gathering your ingredients is the calm before the glorious, buttery storm. The beauty of this recipe is its elegance in simplicity. No obscure items, no long grocery list—just honest, pure components ready to transform. Here’s your mission list.
* **All-Purpose Flour:** The sturdy backbone of our biscuit. It provides the structure that holds all those glorious layers together.
* **Baking Powder & Baking Soda:** Our dynamic leavening duo. The powder provides a steady rise, while the soda teams up with the buttermilk for an extra oomph.
* **Salt:** Non-negotiable. It enhances every other flavor and makes the butter taste even more, well, buttery.
* **Cold Butter:** This is the heart of the flakiness. We need it so cold it practically shatters when cut. The solid fat pockets create steam as they bake, pushing the dough into separate, delicate layers.
* **Cold Buttermilk:** The tangy liquid that brings it all together. Keeping it cold is key to maintaining those precious butter chunks.
🍳 Used in this recipe
Get It on Amazon Basics✔ Free Delivery | ✔ Top Rated | ✔ Budget-FriendlyLet’s Get Cooking: The Step-by-Step
Alright, apron on, oven preheating. This is where the fun begins. We’re not aiming for perfection on the first try; we’re aiming for deliciousness. Follow these steps, and you’ll be a biscuit-making pro in no time.
First, the dry team. In a large bowl, whisk together your flour, baking powder, baking soda, and salt. This ensures every single bite is evenly seasoned and perfectly risen. Now, the most critical step: the butter. Take your very cold butter and cut it into small cubes. You can use a pastry cutter, two knives, or even your fingertips to work the butter into the flour mixture. You’re looking for a coarse, crumbly texture with pea-sized bits of butter still visible. **Do not overmix.** Those butter bits are your tickets to flaky town.
Next, make a well in the center and pour in your cold buttermilk. Stir with a fork or a spatula just until the dough comes together. It will be shaggy and a little sticky—that’s a good thing! Turn it out onto a lightly floured surface and gently pat it into a rectangle. Fold it over on itself, like a letter, and pat it down again. This folding technique creates layers. Repeat this 2-3 times. Pat the dough to about 1-inch thickness and use a sharp, floured biscuit cutter to punch out your rounds. **Press straight down, don’t twist!** Twisting seals the edges and prevents rising.
🍳 Used in this recipe
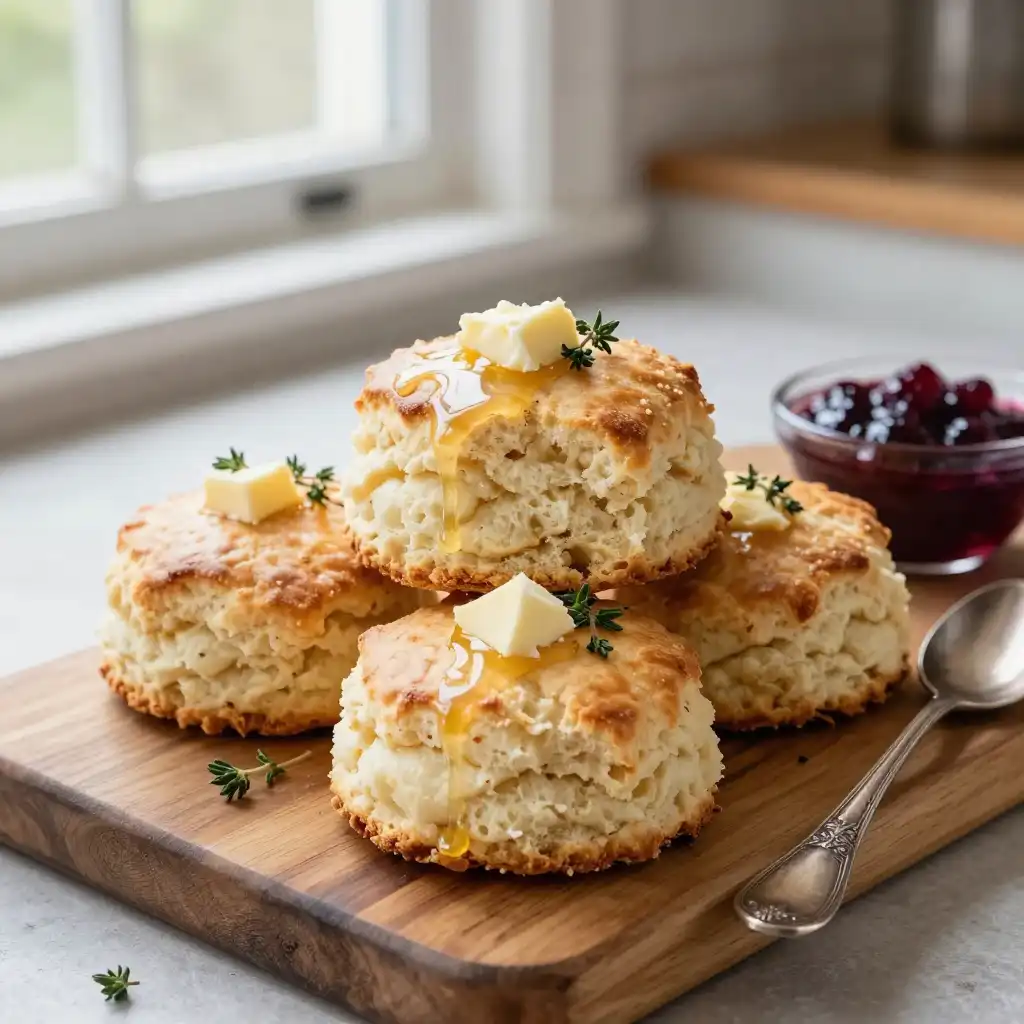
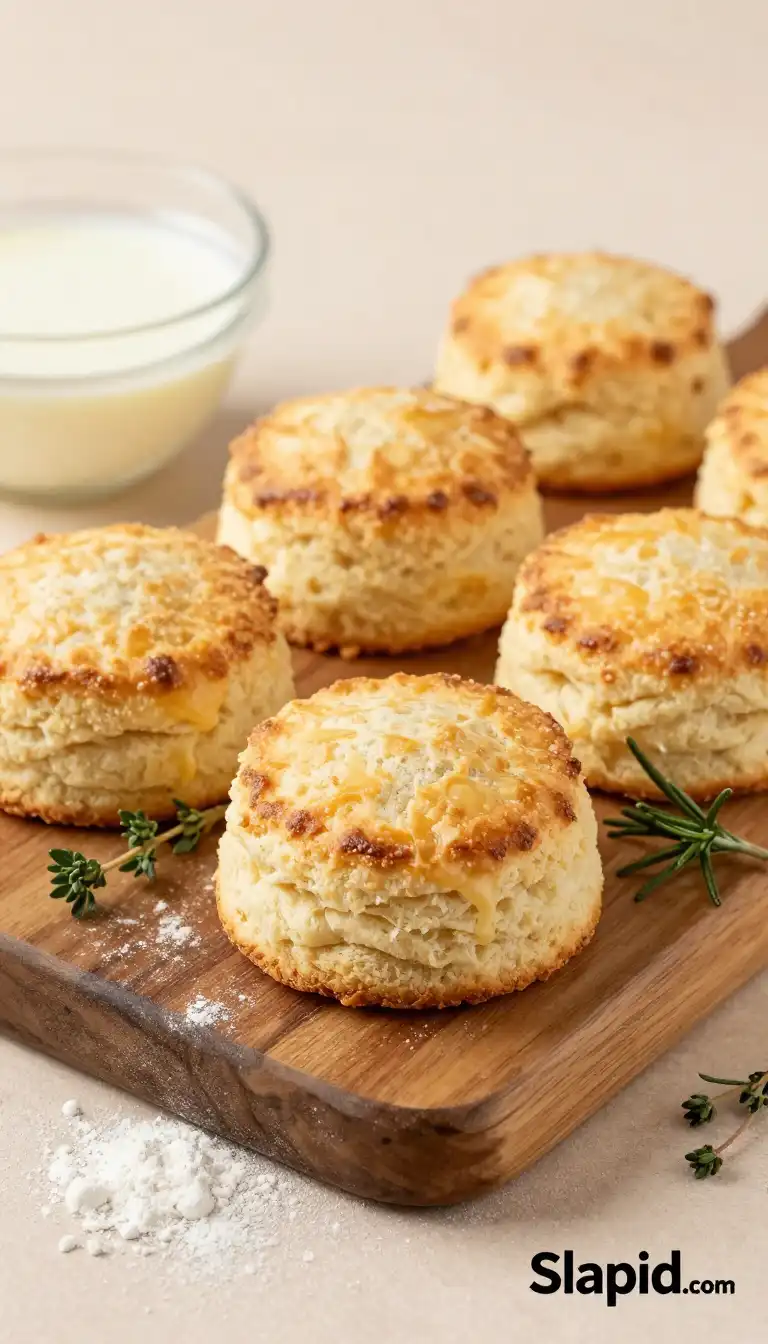
Get It on Amazon Basics✔ Free Delivery | ✔ Top Rated | ✔ Budget-FriendlyPlace your biscuits on a baking sheet, sides just touching, and bake until they’re tall, golden brown, and your kitchen smells like heaven. Let them cool for a minute on the pan before transferring to a wire rack. The hardest part is waiting for them to be cool enough to slather with butter.
Biscuit Blunders: A Guide on What Not to Do
We all have baking war stories. Here’s how to avoid the most common pitfalls that can turn your biscuit dream into a dense, sad pancake.
* **The Warm Butter Catastrophe:** Using room-temperature butter is the number one sin. It will melt into the flour, creating a tough, cakey biscuit instead of a flaky one. If your butter softens, pop it back in the fridge for 15 minutes. **Cold is your mantra.**
* **The Overmixing Trap:** As soon as you add the liquid, gluten development begins. The more you mix, the stronger that gluten becomes, leading to tough, chewy biscuits. Mix only until the dough is just combined. A shaggy dough is a happy dough.
* **The Twisted Cutter:** I mentioned it before, but it’s worth repeating. When you use a biscuit cutter (or a glass), press straight down and lift straight up. Twisting the cutter creates a seal on the edge that acts like a brake, stopping the biscuit from rising properly.
* **The Flour Avalanche:** It’s tempting to add a mountain of flour to a sticky dough. Resist! A little stickiness is good. Use just enough flour on your surface and hands to handle the dough without it clinging everywhere. Too much extra flour makes biscuits dry.
🍳 Used in this recipe
Get It on Amazon Basics✔ Free Delivery | ✔ Top Rated | ✔ Budget-FriendlyServing Vibes: Setting the Biscuit Scene
These biscuits are culinary chameleons, fitting into any moment that needs a touch of comfort. Picture a lazy, rainy Sunday morning: you, a steaming cup of coffee, and a basket of these golden orbs fresh from the oven. Slather one with melting butter and a dollop of your favorite jam. The steam, the crunch, the soft center—it’s the perfect antidote to a gloomy day.
Or, transform them into the star of a savory feast. Split them open and pile on scrambled eggs, melted cheese, and a slice of ripe tomato for the ultimate breakfast sandwich. They are the foundational pillar for a legendary biscuits and gravy experience, ready to soak up a rich, creamy sauce. For a gathering, serve them warm in a linen-lined basket as the ultimate side dish that disappears faster than you can say “pass the butter.” No matter the occasion, these biscuits bring a sense of warmth and homemade love to the table.
Recommended Product
 -11%
-11%
8‑Piece Deep Glass Baking Dish Set with Plastic Lids (Rectangular Bakeware)
- Material: Oven, freezer & microwave safe borosilicate glass (goes from fridge/oven without cracking)
- Pieces →: 4 rectangular dishes + 4 tight‑fitting plastic lids (stackable)
- Easy Care →: Dishwasher safe glass & lids
Leftovers? Here’s the Plan
In a perfect world, every biscuit is devoured warm from the oven. But life happens. If you have leftover biscuits, storing them properly is key to reviving their glory.
🍳 Used in this recipe
Get It on Amazon Basics✔ Free Delivery | ✔ Top Rated | ✔ Budget-Friendly**For short-term storage:** Let the biscuits cool completely, then place them in an airtight container or a resealable plastic bag at room temperature for up to 2 days. To revive them, wrap a biscuit in a damp paper towel and microwave for 10-15 seconds. This reintroduces moisture and brings back that fresh-baked tenderness.
**For long-term storage (Freezing):** This recipe is a freezer champion. Once the biscuits are completely cool, wrap each one individually in plastic wrap, then place them all in a large freezer bag. They’ll keep beautifully for up to 3 months. To reheat, unwrap and place them on a baking sheet in a 350°F (175°C) oven for about 10 minutes, or until warmed through and crisped up. This method is far superior to the microwave for maintaining texture.
Biscuit FAQ: Your Burning Questions, Answered
Can I make the dough ahead of time?
Absolutely! You can prepare the dough, pat it out, cut your biscuits, and freeze them raw on a baking sheet. Once solid, transfer them to a freezer bag. When ready to bake, place them on a baking sheet (no need to thaw) and add a few extra minutes to the baking time. This is the ultimate “secret weapon” for last-minute guests.
🍳 Used in this recipe
Get It on Amazon Basics✔ Free Delivery | ✔ Top Rated | ✔ Budget-FriendlyWhat’s the best way to freeze Easy Fluffy Homemade Buttermilk Biscuits from Scratch?
The best method is the “flash freeze” technique mentioned above. Freezing the unbaked, cut biscuits individually first prevents them from sticking together in a solid block. If you’ve already baked them, the method described in the “Leftovers” section works perfectly. For maximum freshness, frozen baked biscuits are best enjoyed within 1-2 months.
How can I calculate the calories in Easy Fluffy Homemade Buttermilk Biscuits from Scratch?
Calculating exact calories can vary based on the specific brands of butter, flour, and buttermilk you use. For a close estimate, you can input the precise ingredients and quantities from this recipe into a reliable online nutrition calculator. Typically, a standard-sized biscuit from this recipe falls in the 200-250 calorie range, depending on its size and butter content.
My biscuits didn’t rise much. What went wrong?
A few things could be the culprit. First, check the freshness of your baking powder and soda. If they’re old, they’ve lost their leavening power. Second, ensure your butter and buttermilk were very cold. Warm ingredients prevent the steam pockets from forming properly. Lastly, did you twist your cutter? Remember, straight down and straight up! Also, make sure your oven is fully preheated before the biscuits go in. The initial blast of high heat is crucial for lift.
🍳 Used in this recipe
Get It on Amazon Basics✔ Free Delivery | ✔ Top Rated | ✔ Budget-FriendlyRecommended Product
 -15%
-15%
Silicone Baking Mat with Measurement Guide (Non-Stick Pastry & Cake Mat)
- Material →: Food-grade silicone (safe for baking)
- Surface →: Non-stick (no butter or oil needed)
- Design →: Measurement guide for perfect cake sizes
Can I use self-rising flour instead?
You can, but you’ll need to adjust the recipe. Self-rising flour already contains baking powder and salt. If you use it, omit the baking powder, baking soda, and salt from the ingredient list. Be aware that the rise and tang might be slightly different, but it can still yield a delicious, tender biscuit. It’s a great shortcut if you have it on hand!
Now you have everything you need to conquer the world of homemade biscuits. It’s a simple, rewarding process that fills your home with an incredible aroma and your belly with pure joy. Happy baking

Easy Fluffy Homemade Buttermilk Biscuits from Scratch
Ingredients
Ingredients
- 2 cups all-purpose flour plus more for dusting
- 1 tbsp baking powder aluminum-free recommended
- 1/2 tsp baking soda
- 1 tsp salt
- 6 tbsp cold unsalted butter cut into 1/2-inch cubes
- 3/4 cup cold buttermilk shake well before measuring