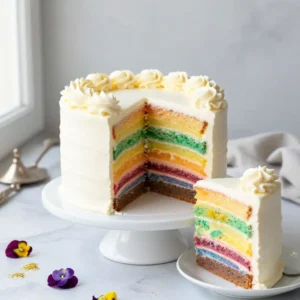
Imagine walking into a room and seeing a cake that looks perfectly innocent on the outside—dressed in snowy white buttercream—only to watch the knife glide through and reveal a defiant, technicolor explosion.
That first slice is always a moment of pure magic. The air fills with the heady, comforting scent of high-grade vanilla bean, and the sponge is so light it practically defies gravity.
Recommended Product
 -15%
-15%
Silicone Baking Mat with Measurement Guide (Non-Stick Pastry & Cake Mat)
- Material →: Food-grade silicone (safe for baking)
- Surface →: Non-stick (no butter or oil needed)
- Design →: Measurement guide for perfect cake sizes
We aren’t just baking a dessert today. We are building a masterpiece that makes grown adults gasp and kids lose their minds.
🍳 Used in this recipe
Get It on Amazon Basics✔ Free Delivery | ✔ Top Rated | ✔ Budget-Friendly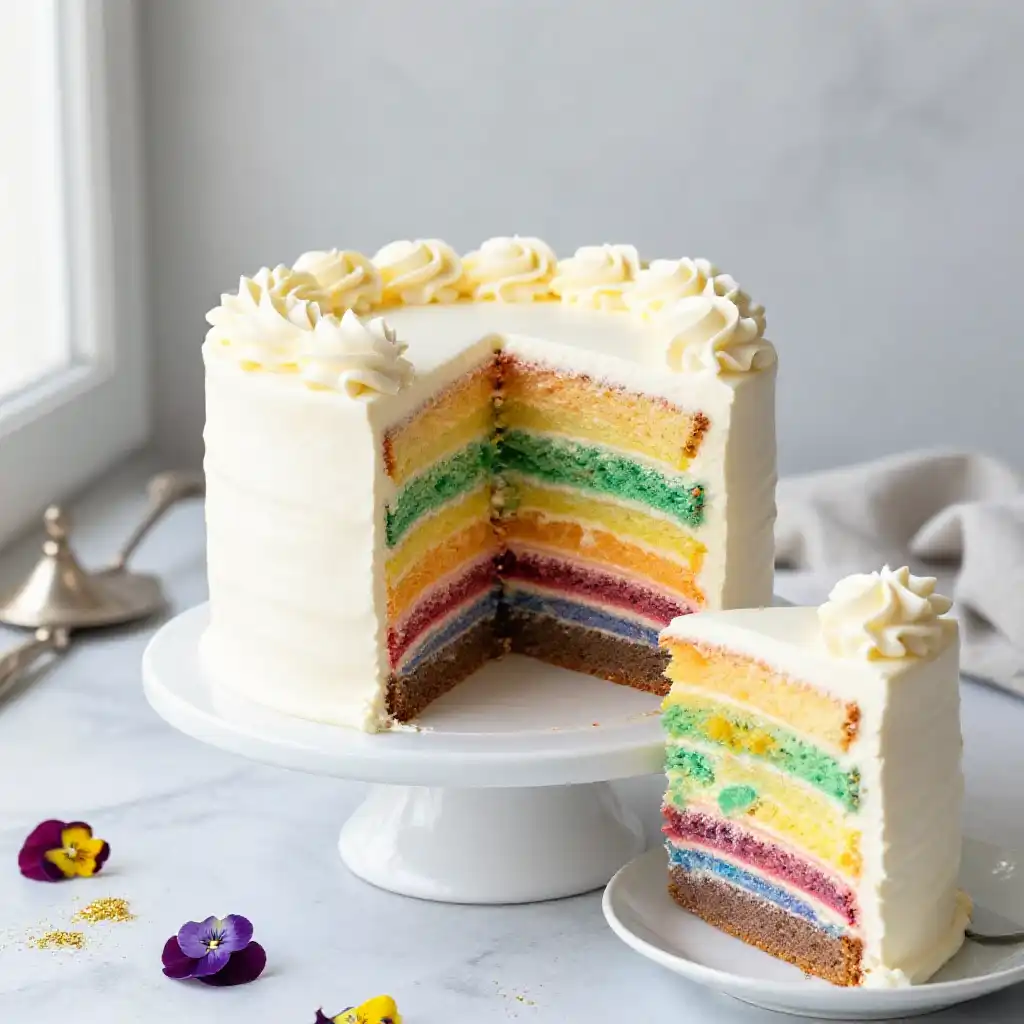
The Architecture of a Showstopper
Listen, I’ve seen enough “sad cakes” in my life to know that a Rainbow Layered Vanilla Sponge Cake needs more than just food coloring. It needs soul.
Most people think a rainbow cake is just about the aesthetics. They’re wrong.
If the sponge is dry, the colors don’t matter. If the frosting is too sweet, your guests will take two bites and call it a day.
🍳 Used in this recipe
Get It on Amazon Basics✔ Free Delivery | ✔ Top Rated | ✔ Budget-FriendlyThis recipe is the holy grail because it balances a tight, fine crumb with a moisture level that keeps it fresh for days. It’s a structural marvel that tastes like a cloud dipped in sunshine.
But here is the real secret:
We aren’t using just any vanilla. We are double-scenting this batter with both extract and a hint of vanilla bean paste to ensure that the flavor punches through the visual noise.
🍳 Used in this recipe
Get It on Amazon Basics✔ Free Delivery | ✔ Top Rated | ✔ Budget-FriendlyThe Flavor Makers: What to Raid From the Pantry
Before you preheat that oven, let’s talk shop. You can’t make a legendary cake with mediocre supplies.
For an easy Rainbow Layered Vanilla Sponge Cake, you need quality fats and fine sugars.
* Cake Flour: Forget all-purpose. We want that low protein content for a soft, velvety texture.
* Unsalted Butter: Softened to the point where it feels like room-temperature silk.
* Egg Whites: We use more whites than yolks to keep the colors of our rainbow vibrant and true.
* Gel Food Coloring: This is non-negotiable. Liquid coloring will mess with your chemistry; gel gives you neon brightness without the watery mess.
* Heavy Cream: For a frosting that’s stable enough to hold six layers but light enough to melt on the tongue.
🍳 Used in this recipe
Get It on Amazon Basics✔ Free Delivery | ✔ Top Rated | ✔ Budget-FriendlyWhile you’re gathering your goods, check out some of these other incredible recipes to round out your baking repertoire!
The Science of the Sponge
Why does this cake stay so bouncy? It’s all about the creaming method.
When you beat butter and sugar together, you aren’t just mixing them. You are physically forcing air into the fat, creating millions of tiny bubbles.
🍳 Used in this recipe
Get It on Amazon Basics✔ Free Delivery | ✔ Top Rated | ✔ Budget-FriendlyWhen the cake hits the heat of the oven, those bubbles expand. If you rush this step, your cake will be a colorful brick.
Spend the full five minutes creaming. Your arms might get tired, but your taste buds will thank you.
Also, we use buttermilk. The acidity in the buttermilk reacts with the leavening agents to create a tender crumb that stays moist, even after you’ve sliced into it.
🍳 Used in this recipe
Get It on Amazon Basics✔ Free Delivery | ✔ Top Rated | ✔ Budget-FriendlyIf you’re looking for something refreshing to sip while you wait for those layers to bake, check out these vibrant smoothie ideas that match the rainbow vibe!
The Step-by-Step: Let’s Get Cooking
Ready to dive in? Here is how to make Rainbow Layered Vanilla Sponge Cake like a pro.
Phase 1: The Batter Base
Start by whisking your dry ingredients—cake flour, baking powder, and salt. In a separate bowl, cream that butter and sugar until it looks like white, fluffy clouds.
🍳 Used in this recipe
Get It on Amazon Basics✔ Free Delivery | ✔ Top Rated | ✔ Budget-FriendlySlowly incorporate your egg whites and vanilla. The mixture should look glossy and smooth.
Phase 2: The Great Division
Now comes the fun part. Weigh your batter. Seriously, grab a kitchen scale.
Divide the batter equally into six bowls. This ensures every layer is the same height.
🍳 Used in this recipe
Get It on Amazon Basics✔ Free Delivery | ✔ Top Rated | ✔ Budget-FriendlyAdd your gel colors: Red, Orange, Yellow, Green, Blue, and Purple. Stir gently so you don’t knock out all that air we worked so hard to get in there!
Phase 3: The Bake
Spread the batter into prepared pans. Since the layers are thin, they bake fast.
Watch for the edges to just barely pull away from the sides. The smell in your kitchen right now should be absolutely intoxicating.
🍳 Used in this recipe
Get It on Amazon Basics✔ Free Delivery | ✔ Top Rated | ✔ Budget-Friendly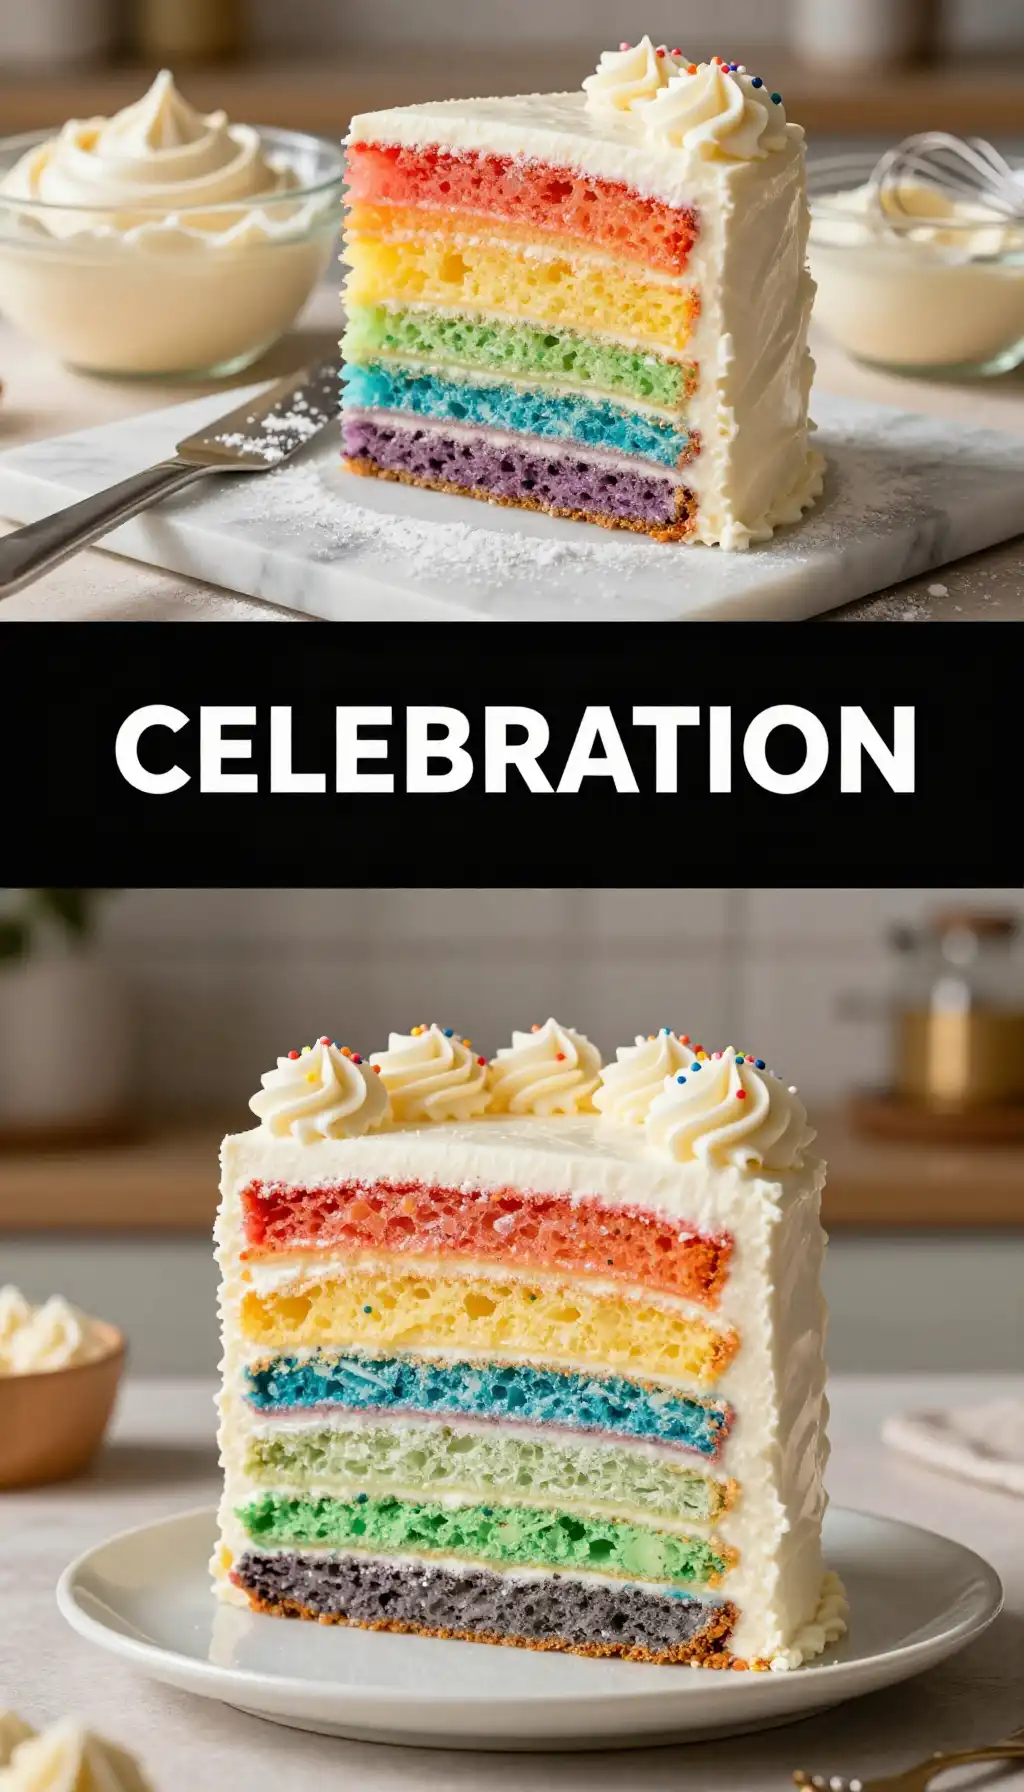
How NOT to Mess This Up (The Pitfalls)
Baking a six-layer cake is a marathon, not a sprint. Here is where people usually trip up:
1. The Warm Cake Disaster: Do NOT try to frost these layers while they are even slightly warm. The buttercream will turn into a greasy puddle, and your rainbow will slide right off the plate.
2. Over-mixing: Once you add the flour, stop being aggressive. Fold it in. If you over-mix, you develop gluten, and gluten is for bread, not delicate sponge.
3. The Lean: Use a spirit level if you have to! If your layers aren’t flat, the cake will lean. Trim the tops of your cakes with a serrated knife to ensure a perfectly level surface.
Setting the Scene: Serving Vibes
This isn’t a “Tuesday night watching Netflix” cake. This is a “The Room Goes Silent When You Walk In” cake.
🍳 Used in this recipe
Get It on Amazon Basics✔ Free Delivery | ✔ Top Rated | ✔ Budget-FriendlyImagine a bright afternoon garden party. The sun is hitting the white frosting, making it shimmer. You bring out the platter, and everyone expects a standard vanilla cake.
Then, you make the first cut.
The reveal is the best part. Serve it on simple white plates to let the colors pop. Pair it with a cold glass of sparkling white grape juice or a tart lemon spritzer to balance the sweetness of the buttercream.
🍳 Used in this recipe
Get It on Amazon Basics✔ Free Delivery | ✔ Top Rated | ✔ Budget-FriendlyRecommended Product
 -11%
-11%
8‑Piece Deep Glass Baking Dish Set with Plastic Lids (Rectangular Bakeware)
- Material: Oven, freezer & microwave safe borosilicate glass (goes from fridge/oven without cracking)
- Pieces →: 4 rectangular dishes + 4 tight‑fitting plastic lids (stackable)
- Easy Care →: Dishwasher safe glass & lids
The Burning Questions (FAQ)
How to freeze Rainbow Layered Vanilla Sponge Cake?
If you want to get ahead of the game, you can freeze the individual sponge layers. Wrap them tightly in plastic wrap and then aluminum foil. They will stay fresh for up to three months. When you’re ready to build, frost them while they are still slightly chilled—it actually makes it easier to handle!
How many calories in Rainbow Layered Vanilla Sponge Cake?
Let’s be real: this is a celebration cake. A standard slice usually clocks in around 450 to 550 calories, depending on how generous you are with the buttercream. It’s worth every single calorie for that velvety texture.
Can I make this cake gluten-free?
Absolutely. Swap the cake flour for a high-quality 1:1 gluten-free flour blend that includes xanthan gum. The texture will be slightly denser, but the “wow” factor remains the same.
🍳 Used in this recipe
Get It on Amazon Basics✔ Free Delivery | ✔ Top Rated | ✔ Budget-FriendlyCan I use natural food dyes?
You can, but be warned: natural dyes (like beet powder or spirulina) often fade or change color during the baking process. If you want those electric, neon hues, gel colors are the way to go.
Recommended Product
 -33%
-33%
Astercook 15‑Piece Kitchen Knife Set with Built‑In Sharpener Block
- Built‑In Sharpener →: Integrated sharpener in block for easy maintenance
- Material →: High‑carbon German stainless steel blades (rust‑resistant, durable)
- Dishwasher Safe →: Yes (but hand washing recommended to preserve sharpness)
Leftovers? Here’s the Plan
If you actually have leftovers (a rare occurrence in my house), keep the cake in an airtight container.
The buttercream acts as a sealant, keeping the moisture locked into the sponge. It will stay delicious at room temperature for two days, or in the fridge for up to five.
🍳 Used in this recipe
Get It on Amazon Basics✔ Free Delivery | ✔ Top Rated | ✔ Budget-FriendlyIf it’s been in the fridge, let a slice sit out for 20 minutes before eating. Cold butter is hard; room temperature butter is a dream.
Now, go forth and bake. Your kitchen is about to become the happiest place on earth.
Don’t forget to take a photo of that first slice—it’s a work of art!
Rainbow Layered Vanilla Sponge Cake
Ingredients
Ingredients
- 3 cups all-purpose flour sifted
- 2 cups granulated sugar extra fine
- 1.5 cups unsalted butter softened to room temperature
- 5 large eggs room temperature
- 1 cup whole milk slightly warmed
- 1 tbsp baking powder
- 2 tsp vanilla extract pure Madagascar vanilla preferred
- 0.5 tsp salt fine sea salt
- 6 drops gel food coloring red, orange, yellow, green, blue, purple
- 4 cups confectioners sugar for the buttercream frosting
Notes
🍳 Used in this recipe
Get It on Amazon Basics✔ Free Delivery | ✔ Top Rated | ✔ Budget-Friendly