Close your eyes for a second. Imagine your kitchen air heavy with the scent of toasted nuts and caramelizing sugar. It’s that warm, golden aroma that wraps around you like a cashmere blanket on a Tuesday afternoon. We’re talking about the undisputed heavyweight champion of the cookie jar.
The Classic Peanut Butter Crosshatch Cookies. They aren’t just cookies; they are edible nostalgia. When that first bite crumbles against your tongue—salty, sweet, and outrageously buttery—you’ll understand why humans have been pressing forks into dough for decades.
I’m not interested in those rock-hard discs that break your teeth. No, we are hunting for the holy grail: a crispy edge that yields to a soft, fudge-like center. Grab your cold glass of milk, because things are about to get delicious.
The Anatomy of a Legend
What makes this specific recipe the one you’ll print out and stain with butter fingerprints? It’s the balance. Most cookies go too heavy on the sugar, drowning out the star of the show. Not here.
We use a specific ratio of brown sugar to granulated sugar. Why? Because brown sugar brings the moisture and that deep, molasses-tinted soul, while white sugar ensures those edges get that addictive “snap.” It’s a chemical romance happening right on your baking sheet.
And let’s talk about the texture. These aren’t dainty. They are thick, substantial, and carry the weight of a cookie that knows it’s the favorite child. If you’re looking for more treats to round out your dessert table, check out our other sweet inspirations.
The Nutty Science: Why Peanut Butter Behaves the Way It Does
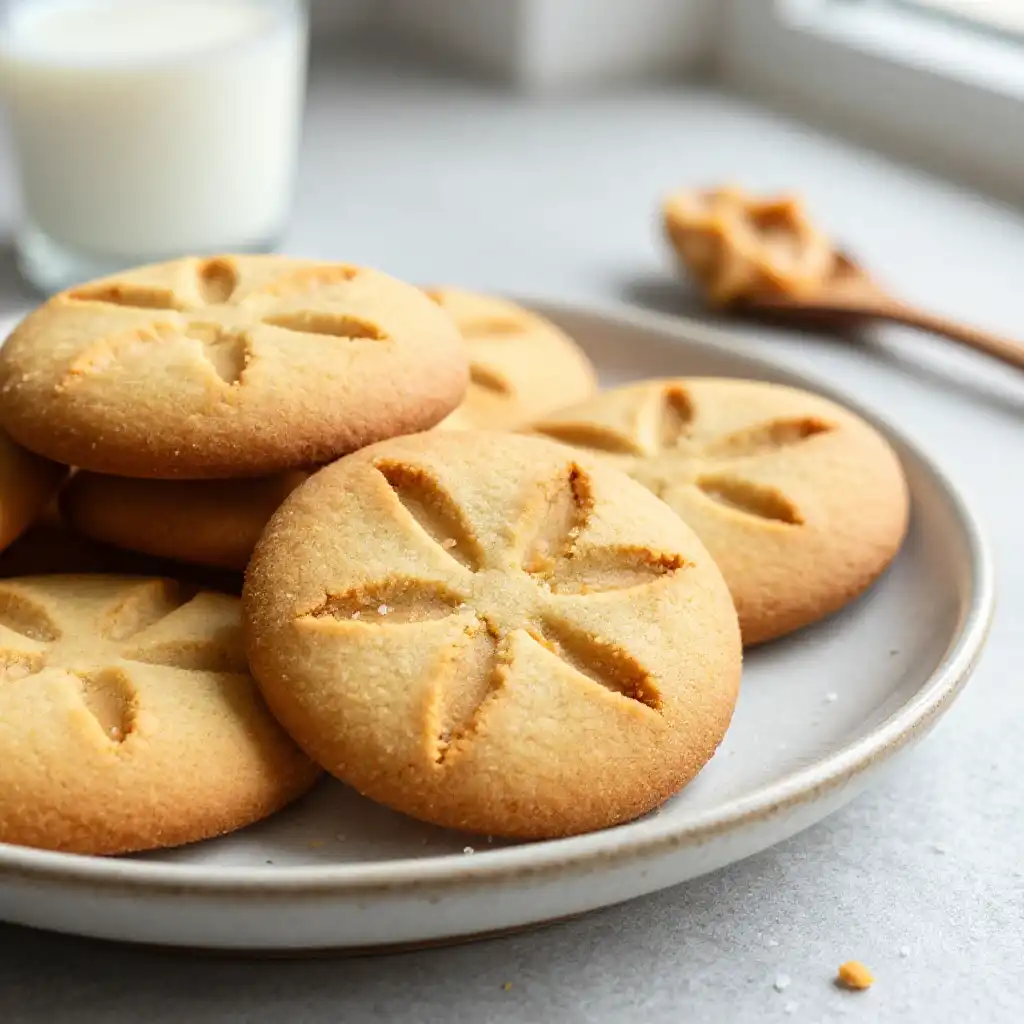
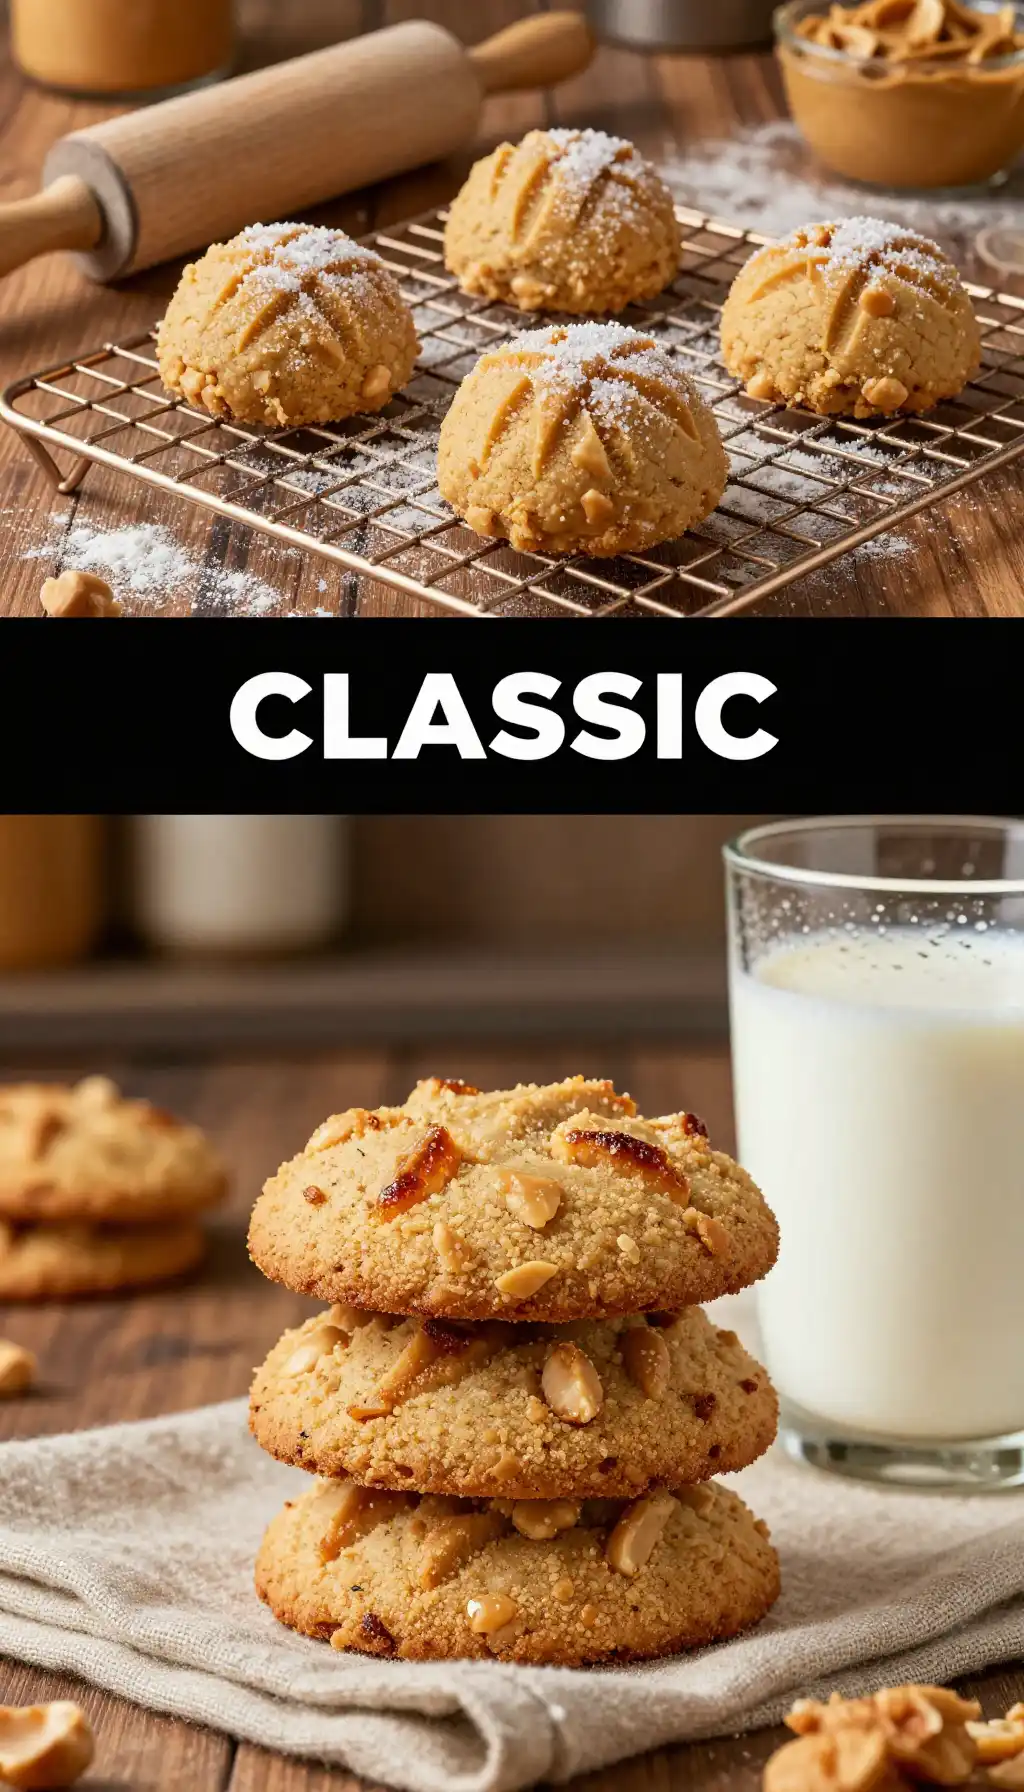
Ever wonder why peanut butter cookies need that iconic fork mark? It’s not just for aesthetics (though it does look incredibly retro-cool). Peanut butter dough is dense. It’s packed with fats and proteins that don’t spread as easily as a standard chocolate chip cookie.
The “crosshatch” actually serves a functional purpose. By flattening the dough balls with a fork, you’re ensuring even baking. Without it, the outside would burn before the middle even realized it was in an oven. You’re basically engineering the perfect bite.
Pro tip: Use a standard, creamy commercial brand for this recipe. While I love the “oil-on-top” natural stuff for my toast, it can be a bit temperamental in baking. We want stability. We want consistency. We want a cookie that doesn’t crumble into dust the moment you touch it.
The Toolkit: What to Raid from the Pantry
You don’t need a culinary degree or a kitchen full of gadgets for this. You just need the basics and a little bit of heart. Here is the lineup for the Classic Peanut Butter Crosshatch Cookies:
- The Fats: High-quality butter (softened, not melted!) and your favorite creamy peanut butter.
- The Sugars: A duo of light brown sugar and white sugar for the perfect chew-to-crunch ratio.
- The Binder: One large egg, room temperature. This is the glue that holds our dreams together.
- The Dry Goods: All-purpose flour, baking soda, and a pinch of sea salt to make those flavors pop.
- The Flavor Booster: A splash of pure vanilla extract. It’s the “perfume” of the baking world.
Let’s Get Cooking: The Step-by-Step
First, preheat your oven to 350°F (175°C). Line your baking sheets with parchment paper. If you don’t use parchment, you’re living dangerously, and I respect that—but your cookies might stick.
Step 1: Creaming the Dream. Beat your butter and both sugars together until the mixture looks pale and fluffy. This takes about 3 minutes. Don’t rush it! We’re aerating the fat here.
Step 2: The Nutty Integration. Add the peanut butter, egg, and vanilla. Mix until just combined. It should smell like heaven at this point.
Step 3: Dry Meets Wet. Whisk your flour, baking soda, and salt in a separate bowl, then slowly add it to the wet mixture. Stop mixing the second the white streaks of flour disappear. Overmixing leads to tough cookies, and we aren’t about that life.
Step 4: The Roll and Press. Scoop tablespoon-sized balls and roll them in your palms. Place them on the sheet. Now, the main event: Dip a fork in a little extra sugar and press it down into the ball. Rotate 90 degrees and press again. Classic Peanut Butter Crosshatch Cookies achieved!
Step 5: The Golden Bake. Pop them in for 10-12 minutes. They will look slightly underdone in the center—that’s the secret! They’ll firm up on the hot pan as they cool.
How NOT to Mess This Up (Common Pitfalls)
Listen, I’ve seen some things in the kitchen. Dark things. If you want easy Classic Peanut Butter Crosshatch Cookies that actually taste good, avoid these blunders:
The “Cold Butter” Disaster
If your butter is cold, it won’t cream. If it won’t cream, your cookies will be heavy, greasy pucks. Set your butter out two hours before you start. If you’re in a rush, grate the cold butter with a cheese grater. Works like a charm.
The Oven Peek-a-Boo
Stop opening the oven door! Every time you do, the temperature drops and your cookies lose their “oomph.” Trust the timer. Use the oven light if you’re anxious.
The Over-Bake Heartbreak
Peanut butter cookies go from “perfect” to “burnt toast” in about 60 seconds. Take them out when the edges are just barely golden. The residual heat is your friend.
Serving Vibes & Pairings
These cookies are the ultimate “afternoon slump” cure. Imagine it: it’s 3:00 PM, the rain is drumming against the window, and you’ve got a warm cookie in one hand and a steaming cup of tea in the other. Pure bliss.
Looking for a more modern pairing? Try serving these alongside a refreshing fruit blend. You can find some incredible inspiration over at Indixer’s drink section. A cold almond milk smoothie and a warm PB cookie? That’s a power move.
The Peanut Butter Cookie Post-Game
How to freeze Classic Peanut Butter Crosshatch Cookies?
You have two options! You can freeze the raw dough balls (after pressing them with the fork) on a tray, then toss them into a freezer bag. Bake them straight from frozen, just add 2 minutes to the bake time. Alternatively, freeze the baked cookies for up to 3 months. They thaw in about 20 minutes, or 10 seconds in the microwave if you’re impatient like me.
What are the Calories in Classic Peanut Butter Crosshatch Cookies?
While it varies based on the size of your scoop, a standard 2-inch cookie typically clocks in around 150-180 calories. But let’s be real—we’re eating these for the soul, not the spreadsheets.
Can I make these gluten-free?
Absolutely! Swap the all-purpose flour for a high-quality 1:1 gluten-free flour blend. Peanut butter is naturally gluten-free, so you’re already halfway there. Just ensure your baking soda is fresh!
Why did my crosshatch marks disappear?
This usually happens if the dough is too warm or if you used too much butter. Chilling the dough balls for 15 minutes before pressing and baking can help those iconic marks stay sharp and defined.
The Final Crumb
There is a reason the how to make Classic Peanut Butter Crosshatch Cookies search is always trending. It’s a recipe that transcends generations. It’s the cookie your grandma made, and it’s the cookie your kids will ask for.
They are humble, they are honest, and they are spectacularly delicious. So, go forth. Preheat that oven. Get your fork ready. Your kitchen is about to become the best-smelling place on the planet.
Don’t forget to share your bakes with us! There’s nothing we love more than seeing those perfectly pressed patterns. Happy baking!

Classic Peanut Butter Crosshatch Cookies
Ingredients
Ingredients
- 1 cup creamy peanut butter do not use natural oil-separated varieties
- 0.5 cup unsalted butter softened to room temperature
- 0.5 cup granulated white sugar plus extra for rolling
- 0.5 cup packed light brown sugar
- 1 large egg room temperature
- 1 tsp pure vanilla extract
- 1.25 cups all-purpose flour spooned and leveled
- 0.75 tsp baking soda
- 0.5 tsp baking powder
- 0.25 tsp sea salt