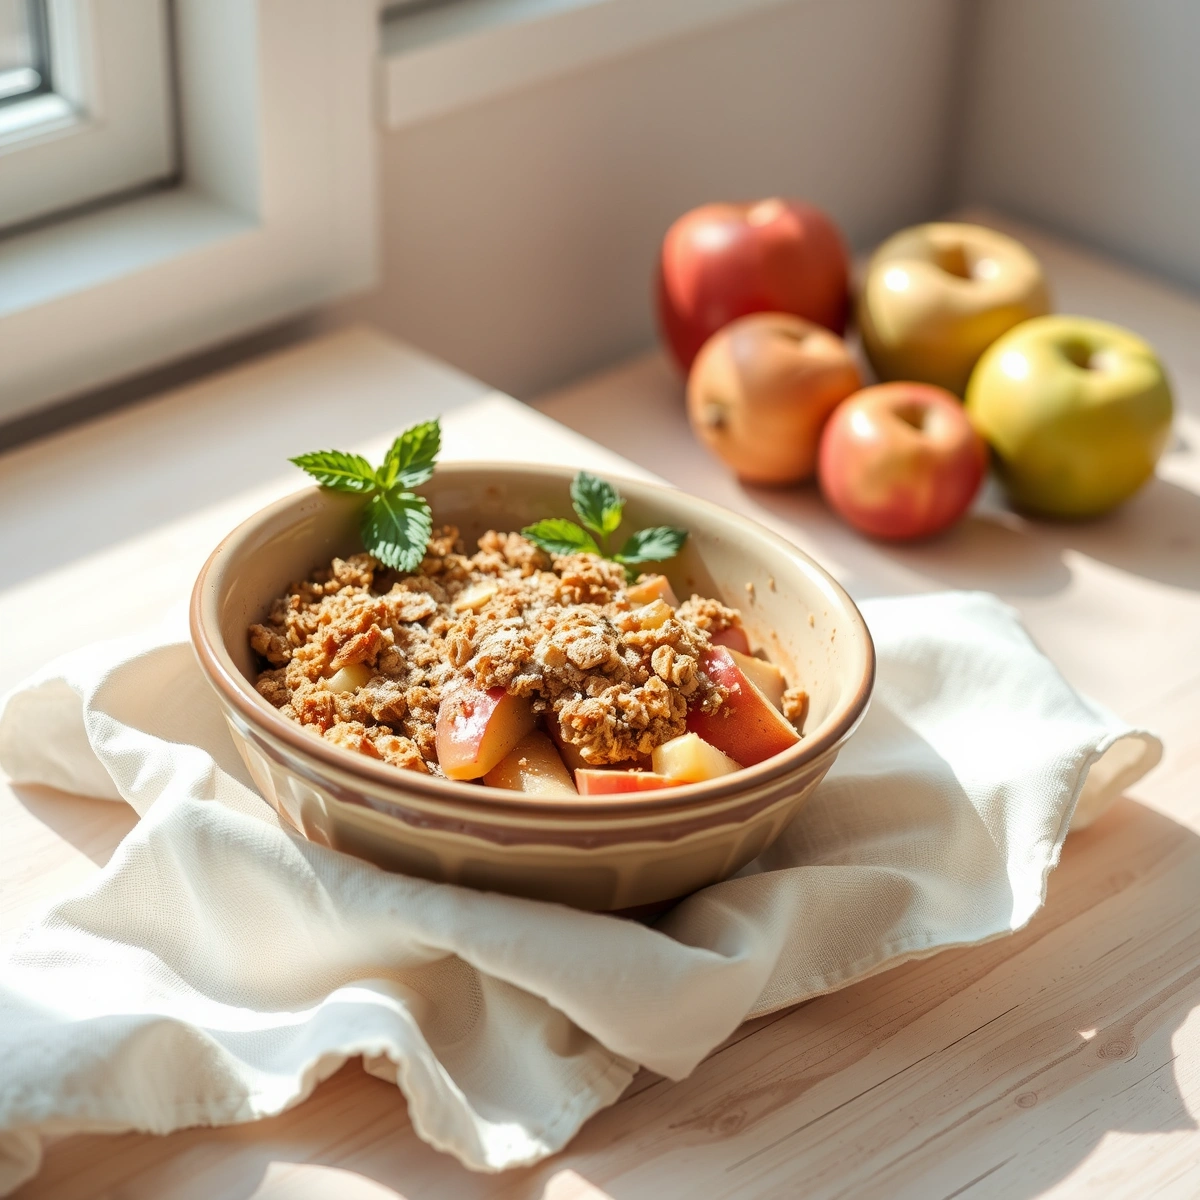
The Scent of a Thousand Autumns
There’s a certain magic that happens when cinnamon and sugar meet the heat of an oven. It’s a scent that bypasses your brain and goes straight for the heart. It’s the smell of cozy sweaters, of crunching leaves underfoot, of a blanket fort built for two. For me, though, it’s the smell of victory. I once tried to impress a date by making a ridiculously complex, multi-layered apple torte. It was a disaster. The crust was tough, the filling was soupy, and my confidence was puddled on the floor. The next day, I went back to basics: a pile of sliced apples, a handful of pantry staples, and a crunchy, buttery blanket of oats. This, my friends, is the hero we need. This is the **Easy Baked Apple Crumble with Oat Topping**. It’s not just a dessert; it’s a warm hug in a dish, a culinary exclamation point on a perfect day or a comforting whisper on a tough one.
Why This Crumble is Your New Best Friend
Let’s be real, life is too short for fussy desserts. You know the ones—recipes that demand a pastry degree, a stand mixer that costs more than your first car, and an afternoon of meticulous, joyless work. This crumble is the glorious antidote to all that. It’s a recipe that celebrates imperfection. The rustic, craggy topping is part of its charm. The bubbling, caramel-kissed juices that escape the sides are a badge of honor. This is a dessert you can whip up while the pasta is boiling, or assemble in ten minutes before guests arrive, then pop in the oven as a delightful surprise. It delivers that “wow, you made this?!” factor with the ease of a microwave popcorn bag. It’s the ultimate **easy Easy Baked Apple Crumble with Oat Topping**, a reliable friend that never lets you down. It’s the recipe I share with anyone who thinks they “can’t bake,” because you don’t need to be a baker to make magic happen here.
Recommended Product
 -11%
-11%
8‑Piece Deep Glass Baking Dish Set with Plastic Lids (Rectangular Bakeware)
- Material: Oven, freezer & microwave safe borosilicate glass (goes from fridge/oven without cracking)
- Pieces →: 4 rectangular dishes + 4 tight‑fitting plastic lids (stackable)
- Easy Care →: Dishwasher safe glass & lids
The Apple of Your Eye: A Little Fruit Science
The heart of any great crumble is, of course, the apple. But not all apples are created equal. You wouldn’t wear stilettos to go hiking, would you? Same logic applies. You need an apple that can stand up to the heat and not turn into a sad, mushy applesauce. The secret is finding that perfect balance between tart and sweet, and between structure and softness.
🍳 Used in this recipe
Get It on Amazon Basics✔ Free Delivery | ✔ Top Rated | ✔ Budget-FriendlyFor this **Easy Baked Apple Crumble with Oat Topping**, you want apples that say “I can do this!” with confidence. Think firm, think crisp, think varieties that hold their shape but become tender and yielding in the oven. A mix is often your secret weapon. Toss in a Granny Smith for its legendary tartness and its ability to hold its own, then add a sweeter, more aromatic variety like a Honeycrisp or a Braeburn for complexity. The result? You get these beautiful, distinct pieces of apple that are soft but not sloppy, swimming in a fragrant, thickened syrup that’s the perfect consistency. It’s the science of structure meeting flavor, and it’s what elevates a simple crumble to legendary status.
What You Need to Raid From the Pantry
This isn’t a high-maintenance recipe. It’s a “let’s see what we’ve got” kind of situation. The beauty lies in its simplicity, where each ingredient plays a crucial role in the final flavor symphony.
The Apples (The Stars of the Show)
You’ll need about 3 to 4 pounds of firm baking apples. As we discussed, a mix of Granny Smith and Honeycrisp is a dream team. Peel them, core them, and slice them into 1/2-inch thick pieces. Don’t be too precious about uniformity; a little variation adds to the rustic charm.
🍳 Used in this recipe
Get It on Amazon Basics✔ Free Delivery | ✔ Top Rated | ✔ Budget-FriendlyThe Filling Flavors (The Supporting Cast)
This is where the magic starts to bubble. You’ll need granulated sugar for sweetness, a big spoonful of all-purpose flour to thicken those glorious juices, a generous teaspoon of ground cinnamon (don’t be shy!), and a pinch of nutmeg for warmth. A tiny squeeze of fresh lemon juice is non-negotiable—it brightens everything up and keeps the apples from browning while you work. A splash of pure vanilla extract at the end adds a layer of aromatic depth.
The Crunchy Crown (The Grand Finale)
For the topping, grab some old-fashioned rolled oats (not the instant kind!), more all-purpose flour, and brown sugar for that deep, caramel-like sweetness. You’ll also need a pinch of salt to balance the sweetness and a pinch of cinnamon to tie it all together. The final, most important ingredient? Cold, cubed unsalted butter. This is the key to those perfect, crumbly, melt-in-your-mouth clumps. Do not, I repeat, do not use melted butter or you’ll end up with a greasy paste. Cold is king.
The Step-by-Step to Crumble Nirvana
Ready to make some magic? Let’s get our hands a little dirty.
🍳 Used in this recipe
Get It on Amazon Basics✔ Free Delivery | ✔ Top Rated | ✔ Budget-FriendlyFirst, get that oven preheating to 375°F (190°C). While it’s warming up, grab a 9×13 inch baking dish (or something similar) and give it a light greasing. No need for a deep dish, as this crumble loves to spread out and get crispy.
Now, the filling. In a large bowl, toss your sliced apples with the lemon juice. Then, add the granulated sugar, flour, cinnamon, nutmeg, and vanilla. Mix it all up until every single apple slice is coated in that fragrant, sugary goodness. Pour this glorious mountain of apples into your prepared baking dish and spread it out into an even layer.
It’s topping time. In a separate bowl, combine the rolled oats, flour, brown sugar, salt, and cinnamon. Give it a quick stir to distribute everything evenly. Now, add your cold, cubed butter. Using your fingertips (the best tools you have!), rub the butter into the dry ingredients. Keep going until the mixture looks like coarse, uneven breadcrumbs with some larger, pea-sized clumps. Those clumps are your treasure!
🍳 Used in this recipe
Get It on Amazon Basics✔ Free Delivery | ✔ Top Rated | ✔ Budget-FriendlySprinkle this oat mixture generously all over the apples, making sure to cover them completely. Don’t press it down; let it stay light and airy. Now, place the dish on a baking sheet (to catch any bubbling overflow) and slide it into the hot oven. Bake for 40-50 minutes, until the topping is a deep golden brown and the fruit filling is bubbling vigorously around the edges. The smell will be absolutely intoxicating. Let it cool for at least 15 minutes before serving—this allows the juices to set slightly, making it easier to scoop.
How NOT to Make a Crumble (A Cautionary Tale)
Even the simplest recipes have their pitfalls. Here are a few common blunders to sidestep on your journey to crumble glory.
First, the dreaded mush. We’ve talked about it, but it bears repeating: your apple choice is paramount. Steer clear of varieties like Red Delicious or McIntosh unless you enjoy apple sauce. You want bite. You want texture.
🍳 Used in this recipe
Get It on Amazon Basics✔ Free Delivery | ✔ Top Rated | ✔ Budget-FriendlySecond, the soggy bottom. This isn’t a crime, but it’s a cry for help. If your topping is looking a little pale and sad after the recommended time, your oven might be running cool. Don’t be afraid to give it an extra 5-10 minutes. You want a deep, confident golden brown, not a wimpy beige. And that baking sheet underneath? Crucial. It’s your insurance policy against a smoky kitchen.
Third, the greasy slick. This happens when you over-handle the topping with warm hands or, heaven forbid, use melted butter. Remember the cold butter mantra! You’re making crumbles, not a dough. If your hands are warming the butter too much, pop the bowl in the fridge for a few minutes to firm it back up. Clumps are your goal; a uniform paste is the enemy.
Setting the Scene: Crumble Vibes
This isn’t just a dessert; it’s an entire mood. The absolute peak crumble experience happens on a chilly, gray afternoon. The sky is threatening rain, you’ve got a soft sweater on, and you’ve decided the world can wait while you indulge. You pull the crumble from the oven, its steam fogging up the kitchen window. You scoop out a generous portion while it’s still bubbling, the steam rising in fragrant little clouds.
🍳 Used in this recipe
Get It on Amazon Basics✔ Free Delivery | ✔ Top Rated | ✔ Budget-FriendlyRecommended Product
 -15%
-15%
Silicone Baking Mat with Measurement Guide (Non-Stick Pastry & Cake Mat)
- Material →: Food-grade silicone (safe for baking)
- Surface →: Non-stick (no butter or oil needed)
- Design →: Measurement guide for perfect cake sizes
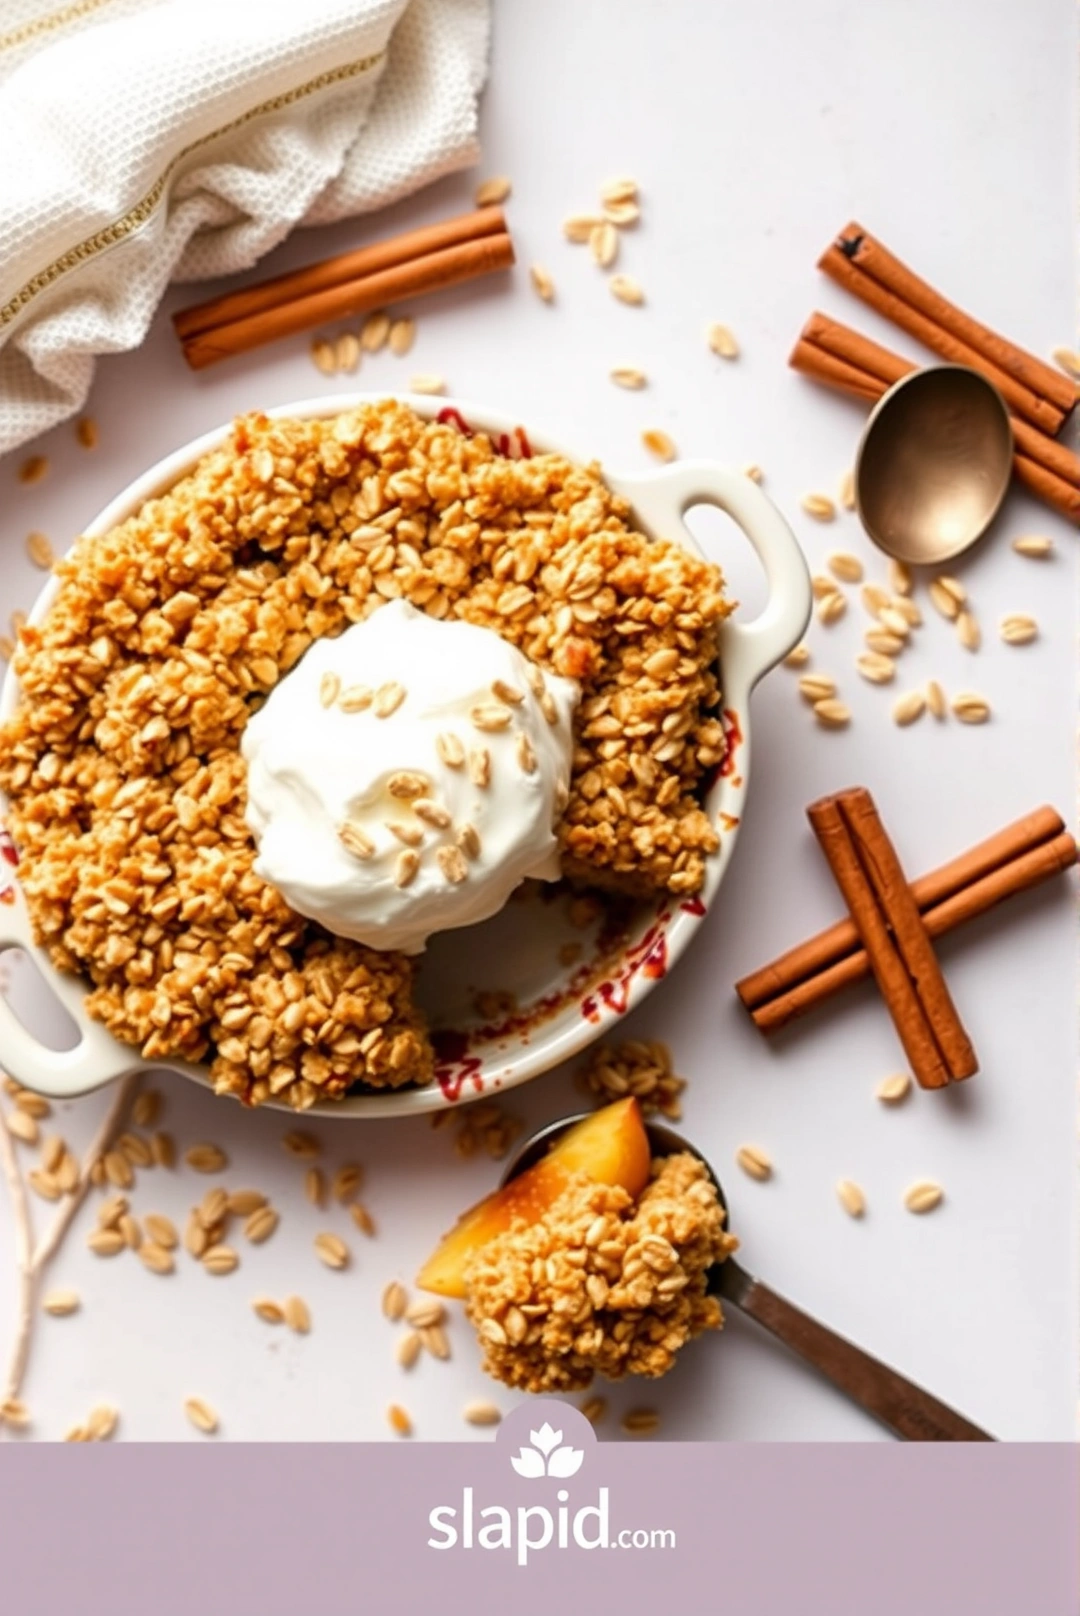
The perfect pairing? A generous pour of cold, creamy vanilla bean ice cream. The contrast of the hot, tender apples and the cold, melting cream is a textural dream. It creates a little pool of melted sweetness in the dish. For an adult twist, a splash of vanilla-infused cream or a drizzle of caramel sauce takes it over the top. This is the dessert you serve after a Sunday roast, at a potluck where you want to be the undisputed hero, or as a simple, heartfelt “I love you” to your family on a random Tuesday. It’s comfort, pure and simple. If you’re looking for more cozy dessert inspiration, you can find tons of great ideas on this Pinterest board for easy baked apple crumble recipe with oats.
Stuff You’re Probably Wondering (The FAQ)
How can I make this a gluten-free Easy Baked Apple Crumble with Oat Topping?
Super simple! Just swap the all-purpose flour in both the filling and the topping for a good quality 1-to-1 gluten-free baking flour blend. Make sure you use certified gluten-free rolled oats, and you’re all set for a delicious, celiac-friendly treat.
How do I freeze the Easy Baked Apple Crumble with Oat Topping?
This is a fantastic make-ahead dessert. You have two options. You can either freeze it before baking or after. To freeze unbaked, assemble the crumble in a freezer-safe dish, wrap it tightly in a layer of plastic wrap followed by a layer of foil, and freeze for up to 3 months. When you’re ready to bake, unwrap it and bake from frozen, adding about 15-20 minutes to the baking time. To freeze leftovers, let the baked crumble cool completely, then wrap and freeze. Reheat in the oven at 350°F (175°C) until warmed through to keep the topping crisp.
🍳 Used in this recipe
Get It on Amazon Basics✔ Free Delivery | ✔ Top Rated | ✔ Budget-FriendlyWhat’s the calorie count in the Easy Baked Apple Crumble with Oat Topping?
That’s a tricky one, as it depends entirely on your portion size and the exact ingredients you use. However, a typical serving (about 1/8th of a 9×13 pan) generally falls in the 300-400 calorie range. The biggest variables are the amount of sugar and butter in the topping. To lighten it up, you can reduce the sugar by a quarter or use a little less butter without too much compromise.
Can I make this Easy Baked Apple Crumble with Oat Topping ahead of time?
Absolutely. You can assemble the entire dish, cover it, and refrigerate it for up to 24 hours before you plan to bake it. When you’re ready, pop it straight into the preheated oven. You may need to add 5-10 minutes to the baking time since it will be starting out cold. Alternatively, you can bake it completely, let it cool, and then gently reheat it. The topping will stay wonderfully crisp.
Recommended Product
 -40%
-40%
Astercook 21‑Piece Non‑Stick Cookware Set with Detachable/Removable Handles
- Pieces Included →: 21‑piece set with multiple pots, pans, and accessories
- Non‑Stick Coating →: Premium ceramic non‑stick free of harmful PFOA chemicals for healthier cooking
- Cleanup →: Easy to clean thanks to non‑stick surface and detachable handles
- Compatibility →: Works on induction, gas, electric, and ceramic stovetops; oven safe with handles removed
My topping isn’t very clumpy. What did I do wrong?
Don’t panic! This is often a temperature issue. Your butter was probably too soft, or your hands were too warm. The key is to work quickly and keep things cool. If you find your mixture is just sandy, try popping the whole bowl in the freezer for 10 minutes to firm up the butter, then try rubbing it in again. If all else fails, it will still taste amazing—it just might be a bit more like an oat streusel than a clumpy crumble. And honestly, there’s no shame in that! For more tips and tricks, you can always check out the full guide on our site: https://slapid.com/recipes/easy-baked-apple-crumble-with-oat-topping/.

Easy Baked Apple Crumble with Oat Topping
Ingredients
Ingredients
- 6 medium apples such as Granny Smith or Honeycrisp, peeled, cored, and sliced 1/4-inch thick
- 2 tbsp lemon juice freshly squeezed
- 1/3 cup granulated sugar divided
- 1 tsp ground cinnamon divided
- 1/4 tsp ground nutmeg optional
- 1 cup old-fashioned rolled oats not instant
- 3/4 cup all-purpose flour
- 1/2 cup light brown sugar packed
- 1/2 cup unsalted butter cold, cut into 1/2-inch cubes
- 1/4 tsp salt
Notes
🍳 Used in this recipe
Get It on Amazon Basics✔ Free Delivery | ✔ Top Rated | ✔ Budget-Friendly