The Sound That Makes My Knees Weak
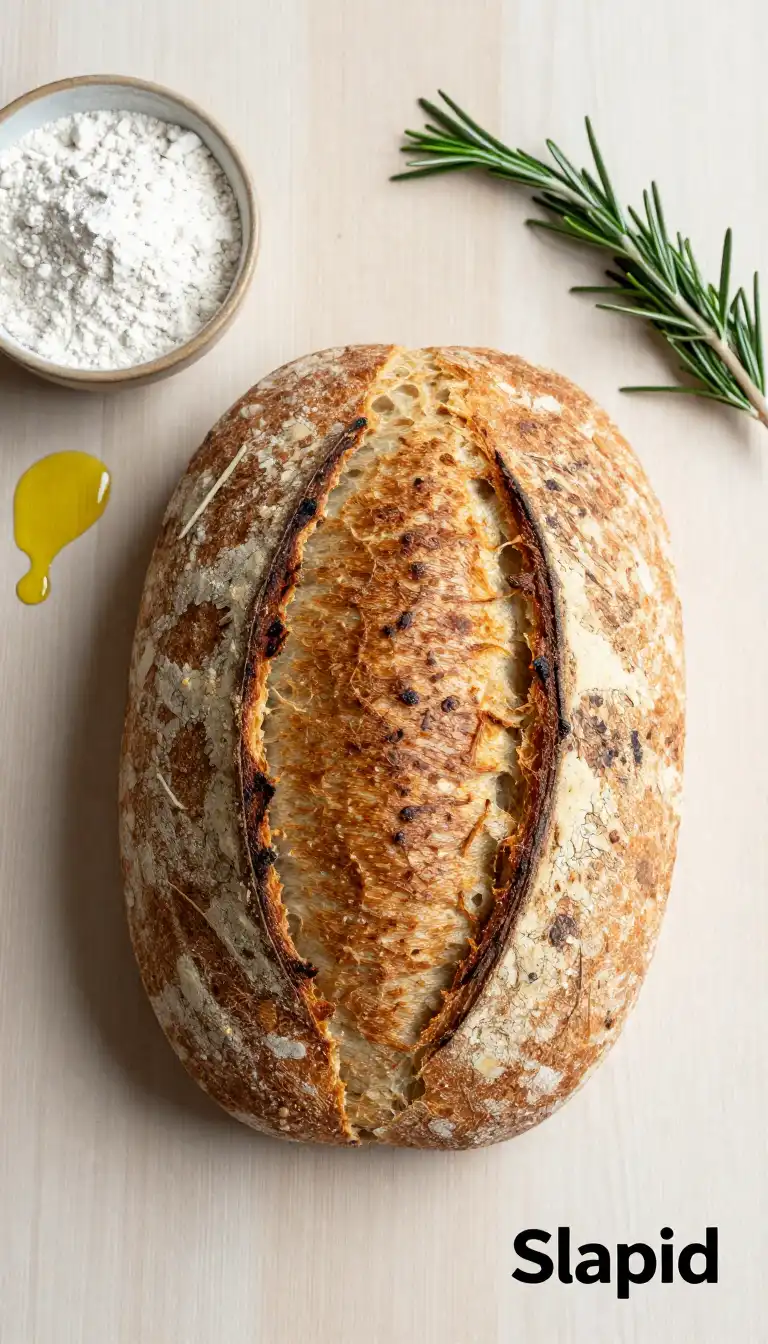
It’s not the whisper of a first love or the crackle of a roaring fireplace. It’s the sound of a knife slicing through a crust so shatteringly crisp it sends a tiny seismic tremor through the countertop. That’s the sound of victory. That’s the sound of this bread. The first time I pulled a loaf from the oven with a crust that sang and an interior with holes you could get lost in, I felt like a wizard. A wizard who hadn’t even broken a sweat. This isn’t just bread; it’s edible magic, and you don’t need a single spellbook (or a fancy stand mixer) to conjure it.

Why This Recipe is a Total Game-Changer
Forget everything you think you know about bread-making. This method is the ultimate culinary hack. The secret isn’t in your biceps; it’s in the clock. You mix a few humble ingredients, then you walk away. For hours. While the yeast and flour do all the heavy lifting, developing a complex, tangy flavor that you simply can’t get from a 10-minute knead. The hands-on time is maybe 15 minutes total. The rest is pure, magical waiting. When you finally bake it in a screaming-hot pot, the steam trapped inside mimics a professional baker’s oven, creating that legendary crackly crust and a soft, chewy crumb that makes store-bought bread taste like a sad, cardboard imposter.
Recommended Product
 -15%
-15%
Silicone Baking Mat with Measurement Guide (Non-Stick Pastry & Cake Mat)
- Material →: Food-grade silicone (safe for baking)
- Surface →: Non-stick (no butter or oil needed)
- Design →: Measurement guide for perfect cake sizes
The Science of Patience (And Why It Tastes So Good)
You might be wondering how something so simple can taste so incredibly complex. The answer lies in a beautiful little process called **autolyse** (fancy word, simple concept). When you first mix flour and water, enzymes start breaking down starches into sugars. This happens before the yeast even gets fully active. It’s like pre-digesting the flour, making it more accessible for the yeast and for flavor development.
🍳 Used in this recipe
Get It on Amazon Basics✔ Free Delivery | ✔ Top Rated | ✔ Budget-FriendlyThen comes the long, cool fermentation. Unlike a quick, warm rise that produces lots of gas but not much flavor, a slow, 12-18 hour rise allows for the development of organic acids. This is where that subtle, sourdough-like tang comes from. It’s the difference between a one-note song and a symphony. The yeast isn’t just creating bubbles; it’s building flavor layers. And when that dough hits the hot pot, the starches on the surface instantly gelatinize and then dry out, forming a fragile, glass-like crust. The trapped steam then keeps the interior moist and airy. It’s simple food science with spectacular results.
Let’s Get Cooking: The Step-by-Step
Ready to become a bread wizard? Here’s your potion list and your spellbook. This recipe is famously forgiving, so don’t stress the small stuff.
What You Need to Raid From the Pantry
* 3 cups (360g) all-purpose flour (plus more for dusting)
* 1 ½ teaspoons fine sea salt
* ½ teaspoon instant yeast (or active dry yeast)
* 1 ½ cups (360ml) warm water (around 100-110°F)
🍳 Used in this recipe
Get It on Amazon Basics✔ Free Delivery | ✔ Top Rated | ✔ Budget-FriendlyThe Ritual: A Step-by-Step Guide
1. **The Big Mix:** In a large bowl, whisk together the flour, salt, and yeast. Pour in the warm water and stir with a sturdy spatula or wooden spoon until a shaggy, sticky dough forms. There shouldn’t be any dry flour patches left. This takes about 30 seconds of stirring. See? No kneading.
2. **The Long Wait:** Cover the bowl tightly with plastic wrap or a damp kitchen towel. Now, go live your life. Let it sit on your counter at room temperature for 12 to 18 hours. You’ll see it become bubbly, jiggly, and more than double in size. This is the magic happening.
3. **The Gentle Shaping:** Lightly flour a clean surface and your hands. Scrape the dough out of the bowl—it will be sticky and web-like. Gently fold it over on itself once or twice to form a rough ball. Don’t tear it. Place it on a piece of parchment paper.
4. **The Second Rise:** Let the dough rest for 30 minutes while you preheat your oven to 450°F (230°C). Place your Dutch oven (or a heavy, oven-safe pot with a lid) inside the oven as it preheats. You want that pot scorching hot.
5. **The Bake:** Carefully remove the hot pot from the oven. Lift the dough by the parchment paper and lower it into the pot. Cover with the lid and bake for 30 minutes.
6. **The Grand Finale:** Remove the lid. The loaf will be pale but puffed up. Continue baking, uncovered, for another 15-20 minutes, until the crust is a deep, glorious golden brown.
7. **The Hardest Part:** Carefully lift the bread out of the pot and place it on a wire rack. You MUST let it cool for at least 30 minutes before slicing. I know it’s torture, but cutting into hot bread creates a gummy interior. Patience, my friend.
How NOT to Mess This Up (A Survival Guide)
Even wizards have off days. Here are the common pitfalls and how to sidestep them.
My Dough Looks Like a Pancake Batter!
First, take a breath. This dough is *supposed* to be sticky and loose. If it’s truly liquid, you may have mis-measured your water. If it’s just very wet, that’s perfect. Use a wet spatula to handle it instead of adding a ton of extra flour, which can make the bread dense. The key is to work with its sticky nature, not fight it.
🍳 Used in this recipe
Get It on Amazon Basics✔ Free Delivery | ✔ Top Rated | ✔ Budget-FriendlyMy Crust is Pale and Sad.
Two likely culprits: your pot wasn’t hot enough, or you didn’t bake it long enough with the lid off. That final uncovered bake is what creates the deep color and crispness. Don’t be afraid of a dark golden brown—it’s where the flavor lives! Also, ensure you’re using a pot that retains heat well, like cast iron.
It Tastes a Bit Bland.
This usually comes down to salt or time. Make sure you’re using the full amount of salt—it’s a flavor enhancer, not just for taste. And if your bread lacks that tangy complexity, your fermentation time might have been too short. In a cooler kitchen, you might need the full 18 hours. Let your nose and eyes be your guide; it should smell yeasty and sweet and look very bubbly.
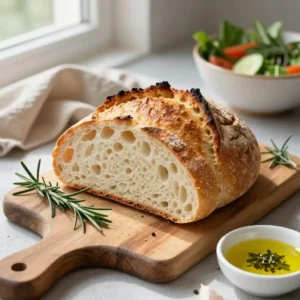
Serving Vibes: Set the Scene
This bread is a chameleon. It’s the star of a cozy, rainy-day soup session, its crust standing up to a thick, creamy tomato bisque. It’s the foundation for the ultimate grilled cheese, with its open crumb soaking up melted cheese like a dream. Slice it thick for a brunch charcuterie board (think: sharp cheddar, fig jam, and crunchy apples). Or, simply tear off a warm hunk, slather it with good salted butter, and eat it standing in the kitchen, reveling in your own genius. It transforms any meal from “dinner” to an “experience.”
🍳 Used in this recipe
Get It on Amazon Basics✔ Free Delivery | ✔ Top Rated | ✔ Budget-FriendlyRecommended Product
 -11%
-11%
8‑Piece Deep Glass Baking Dish Set with Plastic Lids (Rectangular Bakeware)
- Material: Oven, freezer & microwave safe borosilicate glass (goes from fridge/oven without cracking)
- Pieces →: 4 rectangular dishes + 4 tight‑fitting plastic lids (stackable)
- Easy Care →: Dishwasher safe glass & lids
Crumb-Sized Wisdom: Your FAQs, Answered
How can I freeze Easy No-Knead Artisan Bread with Crispy Crust?
This bread freezes beautifully! The key is to freeze it *after* it’s fully cooled. Slice the loaf first (or leave it whole, but slicing is more convenient). Wrap the slices tightly in plastic wrap, then place them in a freezer bag, squeezing out as much air as possible. It will keep for up to 3 months. To reheat, pop frozen slices directly into a 350°F (175°C) toaster or oven for a few minutes until crisp and warm.
What’s the calorie count in Easy No-Knead Artisan Bread with Crispy Crust?
A rough estimate for a standard slice (assuming the loaf is cut into 12 slices) is around **150-180 calories per slice**. This can vary based on exact measurements and slice thickness. It’s a wholesome, satisfying carbohydrate that fuels you, not a diet food—and that’s perfectly okay!
Can I make this without a Dutch oven?
Absolutely! While a Dutch oven creates the perfect steam environment, you can improvise. Preheat a heavy baking sheet or pizza stone. Place the dough on parchment and slide it onto the hot surface. To create steam, place a metal pan (like a roasting pan) on the bottom rack of the oven while it preheats. Right after you put the bread in, carefully pour a cup of hot water into the pan and quickly shut the door. The steam will help the crust develop. Check out more ideas on Pinterest for creative workarounds.
🍳 Used in this recipe
Get It on Amazon Basics✔ Free Delivery | ✔ Top Rated | ✔ Budget-FriendlyCan I use whole wheat flour?
You can, but it will change the texture. For the best results, start by substituting only 1 cup of the all-purpose flour with whole wheat flour. Whole wheat flour absorbs more water and can make the bread denser. If you want to go fully whole wheat, you’ll need to increase the water slightly and expect a heavier, but still delicious, loaf.
Recommended Product
 -33%
-33%
Astercook 15‑Piece Kitchen Knife Set with Built‑In Sharpener Block
- Built‑In Sharpener →: Integrated sharpener in block for easy maintenance
- Material →: High‑carbon German stainless steel blades (rust‑resistant, durable)
- Dishwasher Safe →: Yes (but hand washing recommended to preserve sharpness)
Why do I have to wait so long for it to cool?
I know, it’s the ultimate test of willpower. But here’s the science: when bread is hot, the starches inside are still setting. Cutting into it traps steam and makes the interior gummy and dense. Letting it cool completely (30 minutes minimum, an hour is even better) allows the starches to firm up, resulting in the perfect airy, open crumb you’re after. It’s the final, crucial step in the recipe.
Ready to try this foolproof method for yourself? Find the full, printable recipe here: Easy No-Knead Artisan Bread with Crispy Crust. Happy baking
Easy No-Knead Artisan Bread with Crispy Crust
Ingredients
Ingredients
- 3 cups all-purpose flour plus extra for dusting
- 1.5 tsp fine sea salt
- 0.5 tsp instant yeast
- 1.5 cups warm water about 110°F
Notes
🍳 Used in this recipe
Get It on Amazon Basics✔ Free Delivery | ✔ Top Rated | ✔ Budget-Friendly