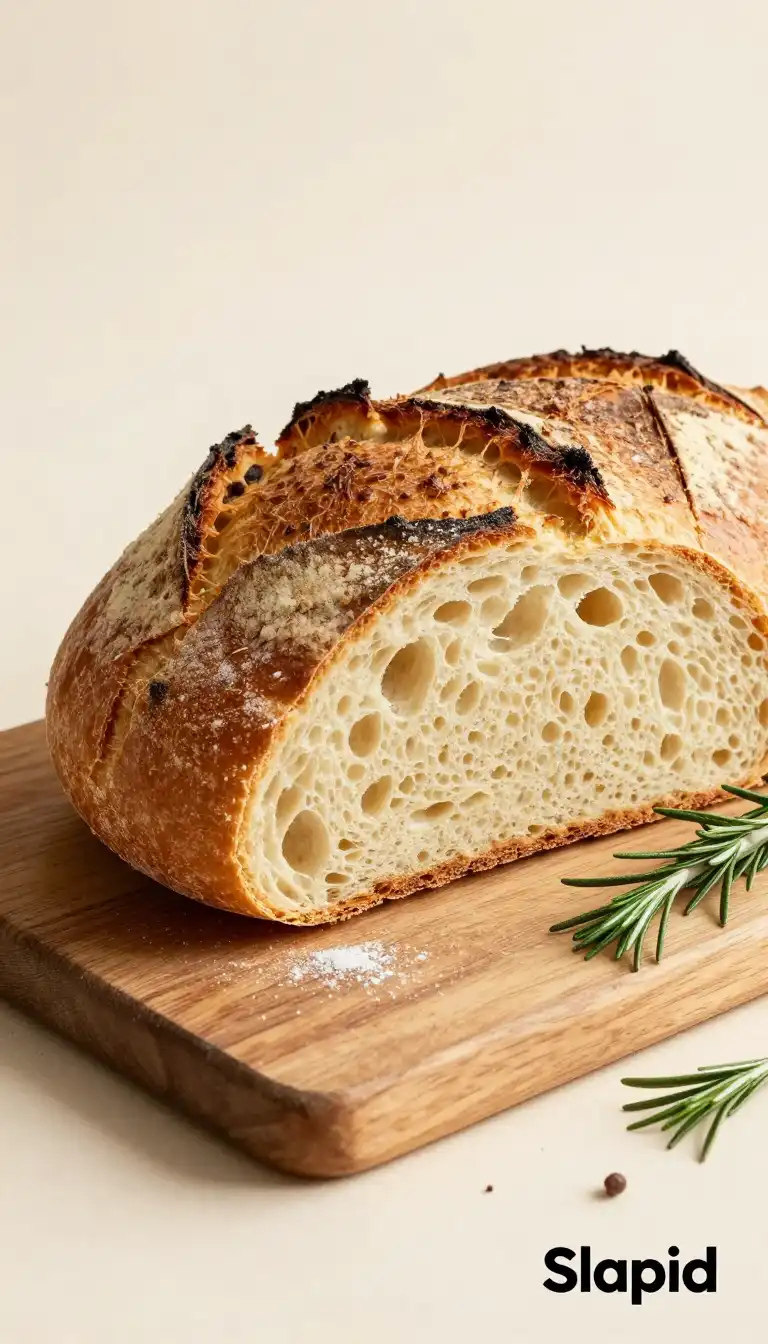
The Sound of Victory (And It’s a Crackle)
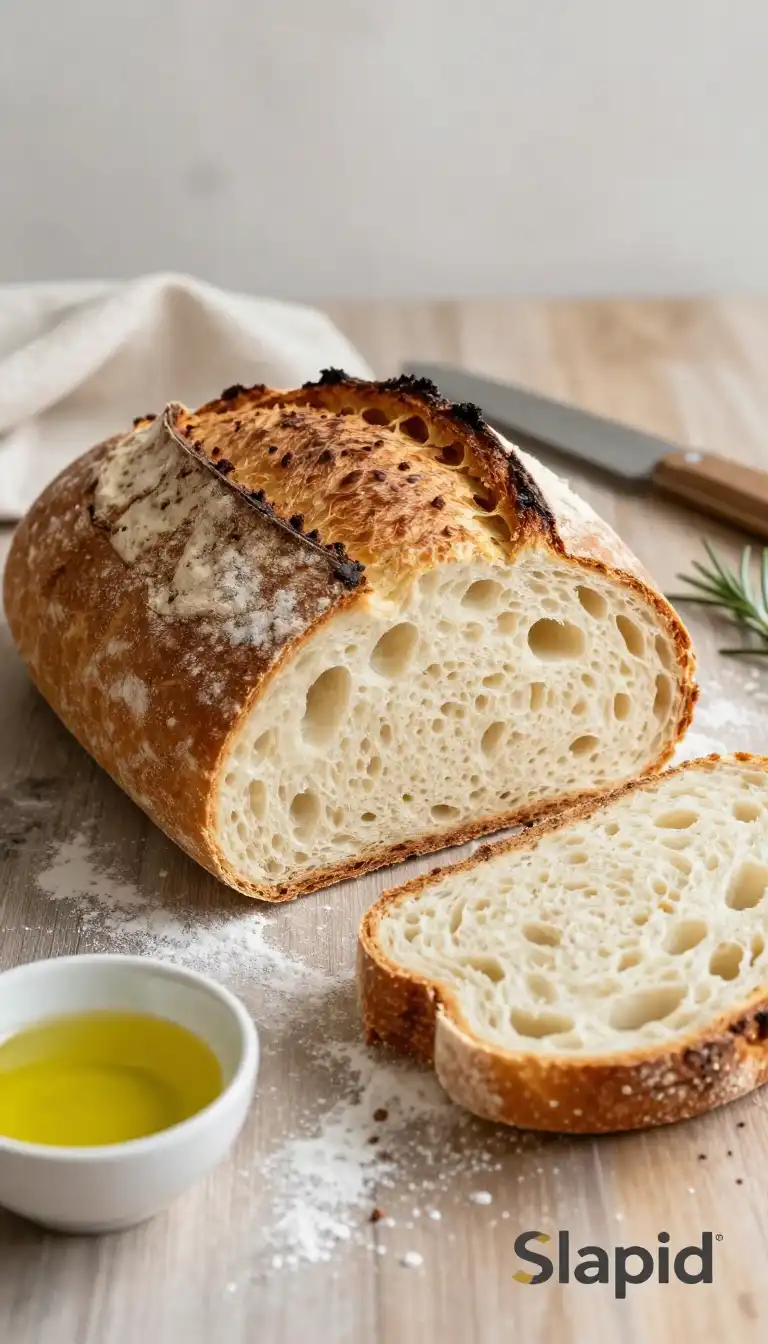
There’s a moment, right as you pull the lid off your Dutch oven, that feels like pure magic. It’s not just the cloud of steam that billows out, smelling of toasted wheat and a deep, almost nutty warmth. It’s the sound. A sharp, satisfying *crackle* that echoes off the kitchen walls, a symphony of a perfectly blistered, golden-brown crust setting itself free. This isn’t just bread. This is the trophy you win for simply mixing flour, water, and salt. It’s the kind of crust that shatters with a gentle press, giving way to a crumb so soft and airy, it feels like you’re holding a cloud. Forget your local bakery. The real magic is happening right here, on your counter, and it takes almost zero effort.

Why This Isn’t Your Grandmother’s Bread Recipe
Let’s be real. The idea of kneading dough can be intimidating. It’s a workout, it’s messy, and it requires a certain… commitment. This recipe flips the script entirely. The secret weapon here isn’t your biceps; it’s **time**. By giving the dough a long, slow fermentation (anywhere from 8 to 24 hours), you’re allowing the wild yeast and bacteria in the flour to do all the heavy lifting. They develop complex, tangy flavors you simply can’t rush. The gluten network forms gently on its own, creating that beautiful, open crumb without you having to punch, stretch, or fold it into submission.
And the Dutch oven? That’s the game-changer for creating a bakery-quality loaf at home. It’s a mini steam oven. When you pop the cold dough into the scorching hot pot and slam the lid on, the moisture from the dough instantly turns to steam. This steam is what gives you that incredible, crackly crust before the bread fully sets and starts to brown. It’s a foolproof method for achieving professional results with a setup you probably already own.
The Alchemy of a Simple Dough
You might look at the ingredient list and think, “That’s it?” Yes. That’s the glorious part. The science is in the combination, not the complexity.
* **Flour:** All-purpose flour is your reliable workhorse. But for a true artisan touch, try substituting 1 cup of it with bread flour. The higher protein content will give your loaf an even more robust structure and chew.
* **Water:** Use warm water (around 100-110°F) to wake up the yeast. If you’re using tap water that’s heavily chlorinated, let it sit out for an hour or use filtered water for the best flavor.
* **Salt:** This isn’t just for taste. Salt tightens the gluten structure, controlling the fermentation rate so your dough doesn’t overproof and collapse. It’s the regulator in this beautiful, bubbling ecosystem.
* **Yeast:** Instant or active dry yeast both work beautifully. No need to “bloom” it in water first—just mix it right in with the dry ingredients. The long fermentation does the rest.
The magic happens when these four simple elements meet. The yeast feasts on the starches in the flour, releasing carbon dioxide bubbles that get trapped in the gluten network. Over 12 hours, these bubbles grow, creating the airy pockets and the signature tangy flavor profile. It’s a living, breathing dough that transforms from a shaggy mass into a structured, flavorful masterpiece.
Common Pitfalls (And How to Sidestep Them)
Even the simplest recipes have their sneaky little traps. Here’s how to ensure your first loaf is a glorious success.
**Pitfall #1: The Fear of a “Wet” Dough.** This dough will be sticky. It will look more like a batter than a traditional bread dough. Do not add more flour! A wet dough is the key to a moist, open crumb. Use a wet hand or a silicone spatula to handle it. Trust the process.
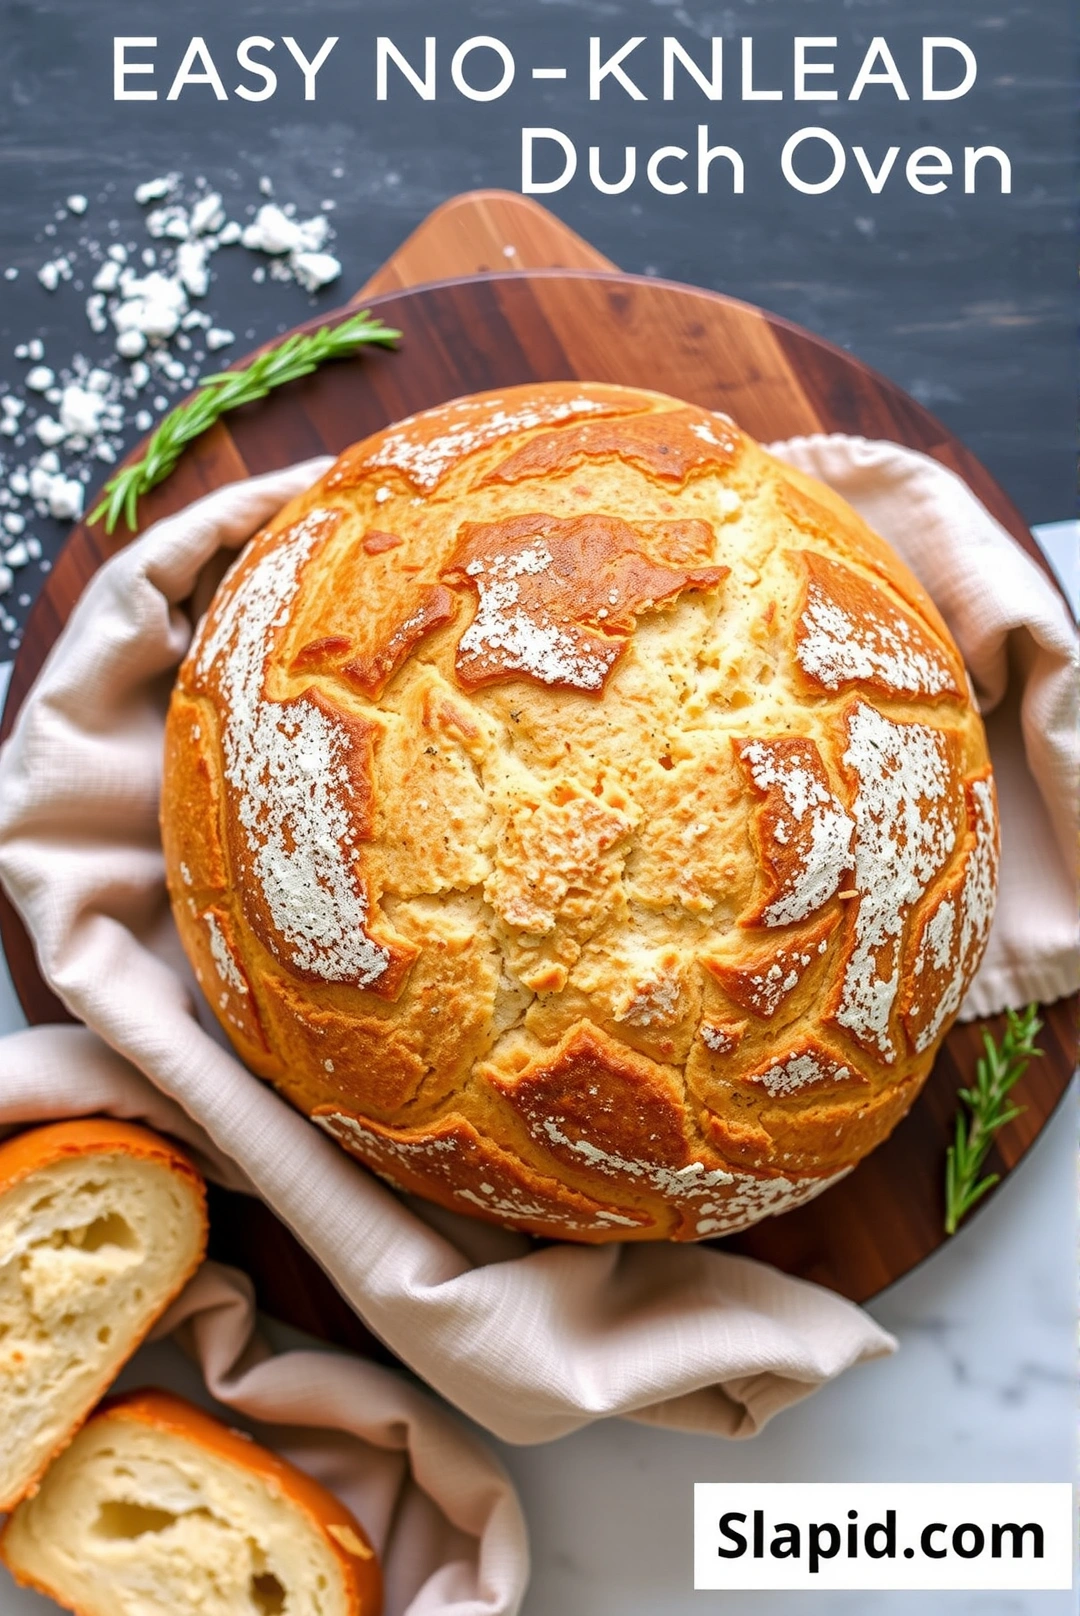
**Pitfall #2: Skipping the Preheat.** This is non-negotiable. Your Dutch oven needs to be screaming hot. Place it in the oven while it preheats for a full 45 minutes. A cold pot means a flat, dense loaf. We want oven spring, and that requires intense, immediate heat.
**Pitfall #3: Impatience During Cooling.** I know, the smell is intoxicating. You want to tear into it immediately. Don’t. The bread is still cooking internally from residual heat. Cutting it too soon will result in a gummy, steamed interior. Let it cool on a wire rack for at least one hour. The wait is a test of character, but your taste buds will thank you.
**Pitfall #4: Using the Wrong Pot.** You need a heavy, oven-safe pot with a tight-fitting lid. A Dutch oven, cast iron combo cooker, or even a heavy stockpot with a lid will work. The weight is important—it retains and distributes heat evenly, which is crucial for that perfect crust.
Serving Vibes: Cozy Comfort or Impressive Centerpiece?
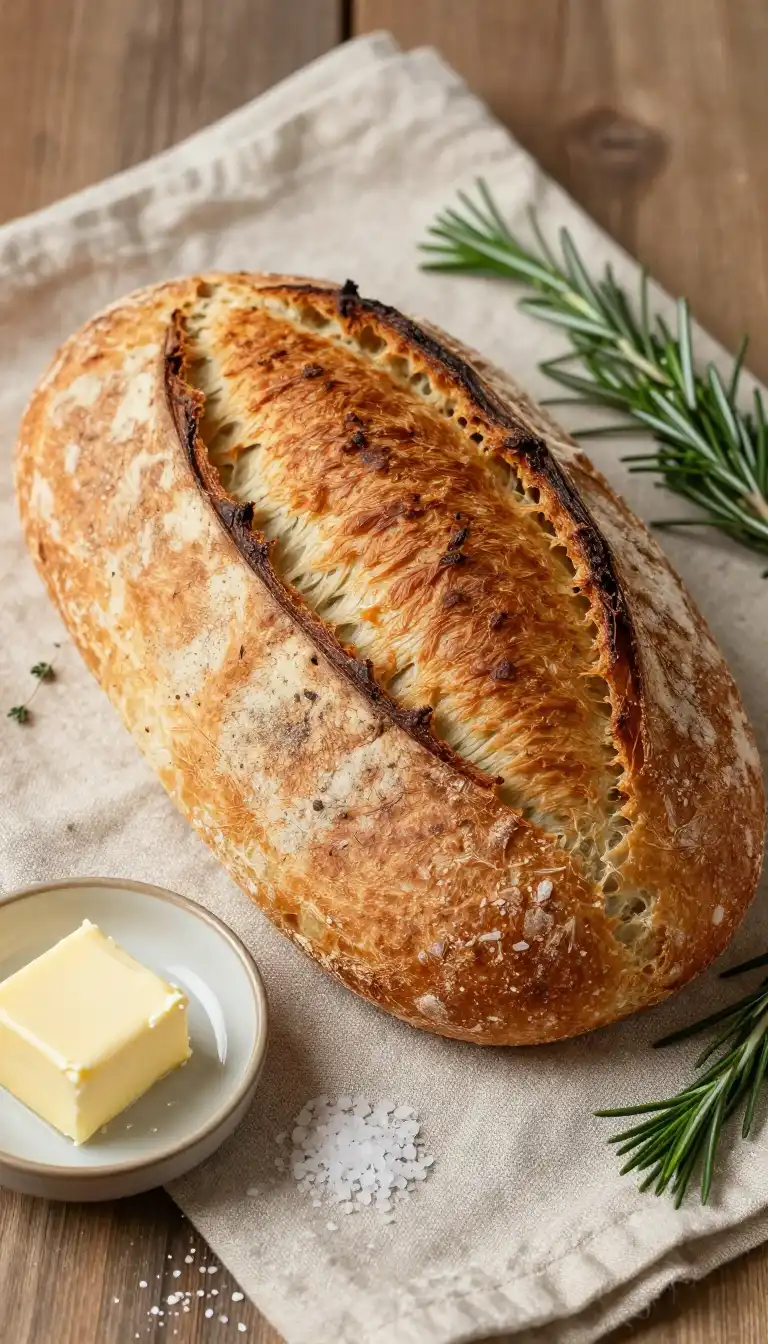
This bread is a chameleon. On a rainy, gray afternoon, there’s nothing better than a thick slice, still slightly warm, slathered with rich, creamy butter that melts instantly into the nooks and crannies. It’s the ultimate comfort food, a simple pleasure that feels like a warm hug from the inside out.
But don’t underestimate its power as a showstopper. Bring a freshly baked, golden loaf to a potluck or dinner party, and watch jaws drop. Tear it apart at the table and let everyone dive in. It’s rustic, it’s beautiful, and it pairs with virtually everything. Think a robust tomato soup, a vibrant olive tapenade, or a board laden with sharp cheeses and fresh fruit. It’s not just a side dish; it’s an experience.
Your Bread Questions, Answered
**How do I store leftovers?**
Once completely cool, store your bread in a paper bag or a bread box at room temperature for up to 2 days. This keeps the crust crisp. For longer storage, wrap it tightly in plastic wrap or aluminum foil and freeze it for up to 3 months. To revive a frozen loaf, let it thaw at room temperature and then pop it in a 350°F oven for 10-15 minutes to refresh the crust.
**Can I use whole wheat flour?**
You can, but start by substituting only 50% of the all-purpose flour with whole wheat. Whole wheat flour absorbs more water and can make the bread denser. If you want a 100% whole wheat loaf, you’ll need to adjust the water ratio and expect a heavier, heartier crumb.
**What’s the calorie count?**
This is a wholesome, simple bread. A typical slice (1/12th of the loaf) made with all-purpose flour is roughly 150-180 calories, depending on the exact slice size. It’s free of any weird additives, making it a fantastic, clean-carb choice for your meals.
**My dough didn’t rise much. What happened?**
This usually comes down to yeast activity or temperature. Check your yeast’s expiration date. If your kitchen is cool, the fermentation time might need to be extended. You can also try placing the bowl in a slightly warmer spot, like an oven with the light on. Patience is key—sometimes it just needs more time to get bubbly.
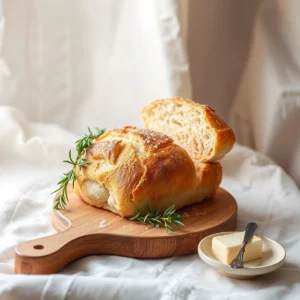
**Can I add herbs or cheese?**
Absolutely! Fold in 1/4 cup of chopped fresh rosemary or thyme, or 1/2 cup of grated sharp cheddar or parmesan during the final shaping step (before the second rise). This is where you can get creative and make the recipe your own.
Ready to start your bread-baking journey? The full, step-by-step guide is waiting for you. For more culinary inspiration and to see how this fits into a world of delicious recipes, check out our collection at [slapid.com/recipes/easy-no-knead-artisan-dutch-oven-bread-recipe/](https://slapid.com/recipes/easy-no-knead-artisan-dutch-oven-bread-recipe/). And if you’re already dreaming of your next loaf, get inspired by browsing the endless ideas on [Pinterest](https://www.pinterest.com/search/pins/?q=how%20to%20make%20no-knead%20dutch%20oven%20bread%20easy). Now, go forth and bake! Your kitchen is about to smell incredible.
Easy No-Knead Artisan Dutch Oven Bread
Ingredients
Ingredients
- 3 cups all-purpose flour plus extra for dusting
- 1.5 cups warm water about 100-110°F
- 1.5 tsp kosher salt fine grain
- 0.25 tsp instant yeast or active dry yeast