The Sound of a Perfect Loaf
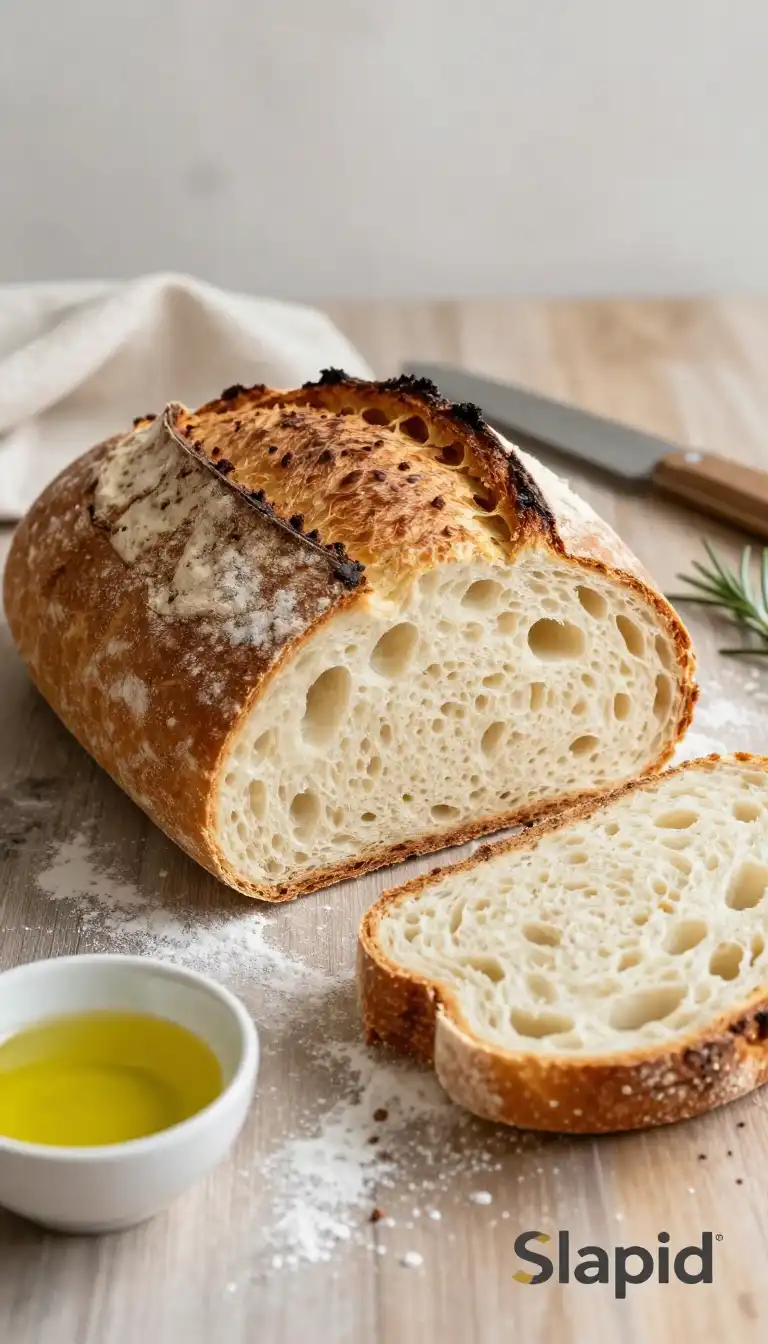
There’s a sound I live for. It’s not the chirp of a bird or the ring of a phone. It’s the deep, satisfying *crack* that happens when you slice into a loaf of bread that’s been resting on a wooden board. The crust shatters into a million golden shards, and a cloud of steam, smelling of toasted grain and earth, puffs into the air. Your knife scrapes against the bottom, and you see it: the interior, a landscape of irregular holes, glistening and soft. This, my friends, is the sound and sight of victory. And you can achieve it with almost zero effort.

Forget everything you think you know about bread baking. We’re not kneading for 15 minutes until our arms ache. We’re not hovering over a dough that needs constant attention. This is a recipe for the gloriously lazy, the ridiculously busy, and the utterly brilliant. This is your new secret weapon. It’s the **Easy No-Knead Artisan Dutch Oven Bread** that will make you look like you’ve been apprenticing in a Parisian boulangerie for a decade.
Why This Recipe is Your New Best Friend
Let’s be real. Most homemade bread recipes feel like a part-time job. This one feels like a gift. The magic isn’t in the ingredients—you only need four pantry staples. The magic is in the method and the vessel. By baking this dough in a preheated Dutch oven with the lid on, you create a miniature steam oven. The trapped moisture from the dough itself keeps the crust soft long enough for the loaf to achieve maximum oven spring (that glorious vertical rise), and then, with the lid off, the dry heat of the oven transforms that crust into a deep, caramelized, blistered shield. It’s a foolproof system for bakery-quality results.
This isn’t just another bread recipe; it’s a confidence booster. There’s no fussy shaping, no scoring with a razor (unless you want to!), and no special equipment besides a heavy pot with a lid. The long, slow fermentation develops complex flavors that you simply can’t get from a quick rise. It’s the kind of recipe that fills your home with an aroma so intoxicating, your neighbors will be subtly peeking through their curtains. And when you pull it out, golden and majestic, you’ll feel a pride that’s entirely disproportionate to the effort you put in. That’s the sweet spot.
The One Ingredient That Does All the Heavy Lifting
We have to talk about yeast. It’s the tiny, invisible powerhouse in this whole operation. For this recipe, we’re using instant yeast, which is wonderfully forgiving. But let’s peek behind the curtain at what’s really happening in that bowl over those 12-18 hours.
While you’re sleeping, working, or binge-watching your favorite show, the yeast is having a feast. It’s munching on the sugars in the flour, producing carbon dioxide gas that gets trapped in the dough’s gluten network. This is what creates the bubbles—the beautiful, irregular holes we covet in an artisan loaf. This long, slow, cold fermentation is the real secret. It allows enzymes in the flour to break down complex starches into simpler sugars, which not only feed the yeast but also contribute to a richer, more nuanced flavor and a beautiful, darker crust when baked. It’s science, but it’s the easiest science experiment you’ll ever do. You literally just mix and walk away.
How to Make Easy No-Knead Artisan Dutch Oven Bread: The Step-by-Step
Alright, let’s get our hands (barely) dirty. This is the fun part where you witness the transformation.
What You Need to Raid From the Pantry
This is a beautiful, minimalist list. No obscure flours, no fancy additives.
* **3 cups (360g) All-Purpose Flour:** The backbone of our loaf. It’s perfectly capable of creating a fantastic chew.
* **1 ½ teaspoons Fine Sea Salt:** Flavor is non-negotiable. It controls the yeast and makes every bite sing.
* **¾ teaspoon Instant Yeast:** Your little leavening agent. If you only have active dry yeast, you can use the same amount, but the rise might be slightly slower.
* **1 ½ cups (355ml) Warm Water:** Think bathwater temperature—around 100°F to 110°F. Too hot will kill the yeast, too cold and it will be sluggish.
The Mixing (Or Lack Thereof)
In a large bowl, whisk together the flour, salt, and instant yeast. Pour in the warm water. Now, take a fork or a spatula and mix until a shaggy, sticky dough forms. There’s no kneading. No smooth ball to develop. It should look messy, and that’s exactly what you want. Cover the bowl with plastic wrap or a damp kitchen towel and let it sit on your counter for 2 to 3 hours, or until it has doubled in size and is dotted with bubbles.
The Long, Patient Wait
This is where the magic deepens. Once the dough has risen, you have a choice. For best flavor, you can gently deflate it, cover it, and pop it in the refrigerator for 12 to 18 hours. If you’re short on time, you can move right to the next step, but the overnight fridge rest is a game-changer. It develops flavor and makes the dough much easier to handle.
Shaping and The Final Rise
Lightly flour a clean surface and turn your dough out of the bowl. With wet or floured hands, gently fold the dough over on itself a few times to form a rough ball. Place it on a piece of parchment paper and let it rest for another 30 minutes while your oven and Dutch oven preheat to 450°F (230°C). The Dutch oven needs to be screaming hot for about 30 minutes.
The Bake: The Grand Finale
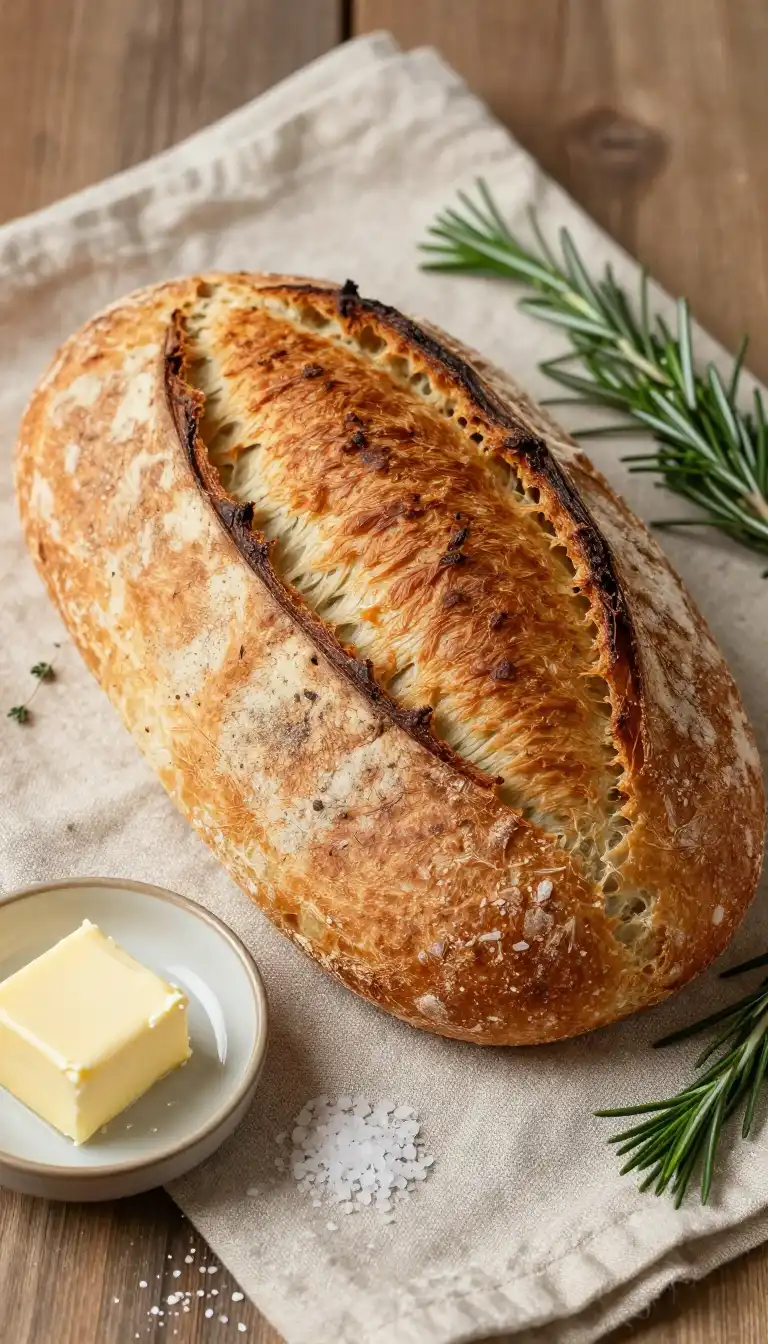
Carefully remove the blazing hot Dutch oven from the oven. Lower your parchment paper with the dough into the pot. Cover with the lid and bake for 30 minutes. This is the steam phase. Then, remove the lid and bake for another 15-20 minutes until the crust is a deep, magnificent brown. Use the parchment paper as a sling to lift the loaf out. You must let it cool on a wire rack for at least an hour before slicing. I know it’s tempting, but patience, young grasshopper. The interior is still setting, and cutting it too soon will result in a gummy crumb.

Common Pitfalls (And How to Sidestep Them)
Even the easiest recipes have a few tripwires. Here’s how to stay upright.
**The Dough That’s Too Sticky:** You might be tempted to add more flour during the initial mix. Resist! This is a high-hydration dough, which is the key to those beautiful, airy holes. It’s supposed to be sticky. If it’s unmanageable later, use wet or floured hands to handle it. Adding too much flour will make your loaf dense and heavy.
**The Loaf That Doesn’t Rise:** Your yeast might be old and inactive. Always check the expiration date. You can test it by mixing a pinch of yeast with a little warm water and sugar. If it doesn’t foam up within 10 minutes, it’s time for a new jar. Also, ensure your water isn’t too hot, which can kill the yeast.
**The Pale, Sad Crust:** Your Dutch oven didn’t get hot enough, or you skimped on the lid-off baking time. That final blast of dry heat is crucial for color and crunch. Don’t be afraid to let it go that extra few minutes for a truly golden-brown crust.
Serving Vibes: Setting the Scene
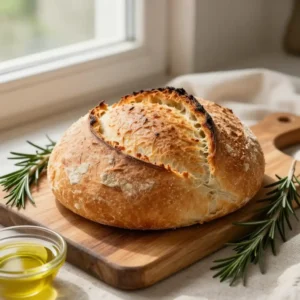
This bread is a chameleon. It fits any moment. It’s the hero of a rainy Sunday, torn apart and slathered with good butter while curled up on the couch. It’s the starchy star of a rustic dinner party, served alongside a steaming bowl of creamy soup where its crust can get gloriously soggy. It’s the base for the most magnificent sandwich of your life, standing up to juicy tomatoes and layers of cheese without getting wimpy. For a truly decadent treat, toast thick slices, rub them with a raw garlic clove, and drizzle with olive oil and flaky sea salt. It’s simple, perfect, and utterly satisfying.
Your Bread Questions, Answered
How to freeze Easy No-Knead Artisan Dutch Oven Bread?
This bread freezes like a dream! Once it’s completely cool, wrap the entire loaf tightly in plastic wrap, then again in aluminum foil, and place it in a freezer bag. It will keep for up to 3 months. To thaw, let it sit on the counter for a few hours. For the best texture, refresh it in a 350°F (175°C) oven for 10-15 minutes directly from frozen. It will taste like you just baked it.
What are the calories in Easy No-Knead Artisan Dutch Oven Bread?
For a rough estimate, one 1/12th of the loaf (about one thick slice) contains approximately 150-180 calories. This can vary based on exact ingredient brands and slice thickness. It’s a wholesome, satisfying carbohydrate that’s far better than most store-bought alternatives, which often contain unnecessary additives and sugars.
Can I use whole wheat flour?
You can, but I’d recommend starting with a blend. Replace half the all-purpose flour with whole wheat flour for your first try. Whole wheat flour absorbs more water and can make the loaf denser. If you go 100% whole wheat, you may need to increase the water slightly and expect a more compact, hearty texture.
My Dutch oven is enamel-coated. Is that okay?
Absolutely! Enamel-coated Dutch ovens are perfect for this recipe. Just be sure to follow the manufacturer’s temperature guidelines. Most can handle the 450°F (230°C) temperature without issue. The enamel makes for easy cleanup, too.
Do I need to score the dough?
This is the beauty of the no-knead method: scoring is optional. Because of the high hydration and the way the dough expands in the covered pot, it often finds its own way to open up. If you want a more controlled “ear” or a specific design, feel free to score it with a very sharp knife or razor blade right before baking. But if you skip it, your bread will still be gorgeous.
Ready for your next baking adventure? For more details and inspiration, check out our full guide on how to make **Easy No-Knead Artisan Dutch Oven Bread** [here](https://slapid.com/recipes/easy-no-knead-artisan-dutch-oven-bread-recipe/). And if you’re visualizing the process, this [Pinterest search](https://www.pinterest.com/search/pins/?q=how%20to%20make%20easy%20no-knead%20bread%20in%20a%20dutch%20oven) is a goldmine of tips and beautiful loaves. Now go forth and bake something amazing
Easy No-Knead Artisan Dutch Oven Bread
Ingredients
Ingredients
- 3 cups All-purpose flour plus extra for dusting
- 1.5 tsp Salt fine sea salt
- 0.5 tsp Instant yeast or active dry yeast
- 1.5 cups Warm water about 110°F (43°C)