When the Sweet Tooth Sirens Call (And Your Oven is on Strike)
There’s a specific kind of quiet desperation that strikes around 3 PM. It’s the slump. The brain fog. The soul-deep craving for something that delivers a one-two punch of salty-sweet, creamy-crunchy satisfaction. You could bake something elaborate, but let’s be real—your oven is currently a monument to forgotten preheat settings and the ghost of last week’s cookies. This is the moment these bars were born for. They’re not a dessert; they’re a rescue mission for your willpower.
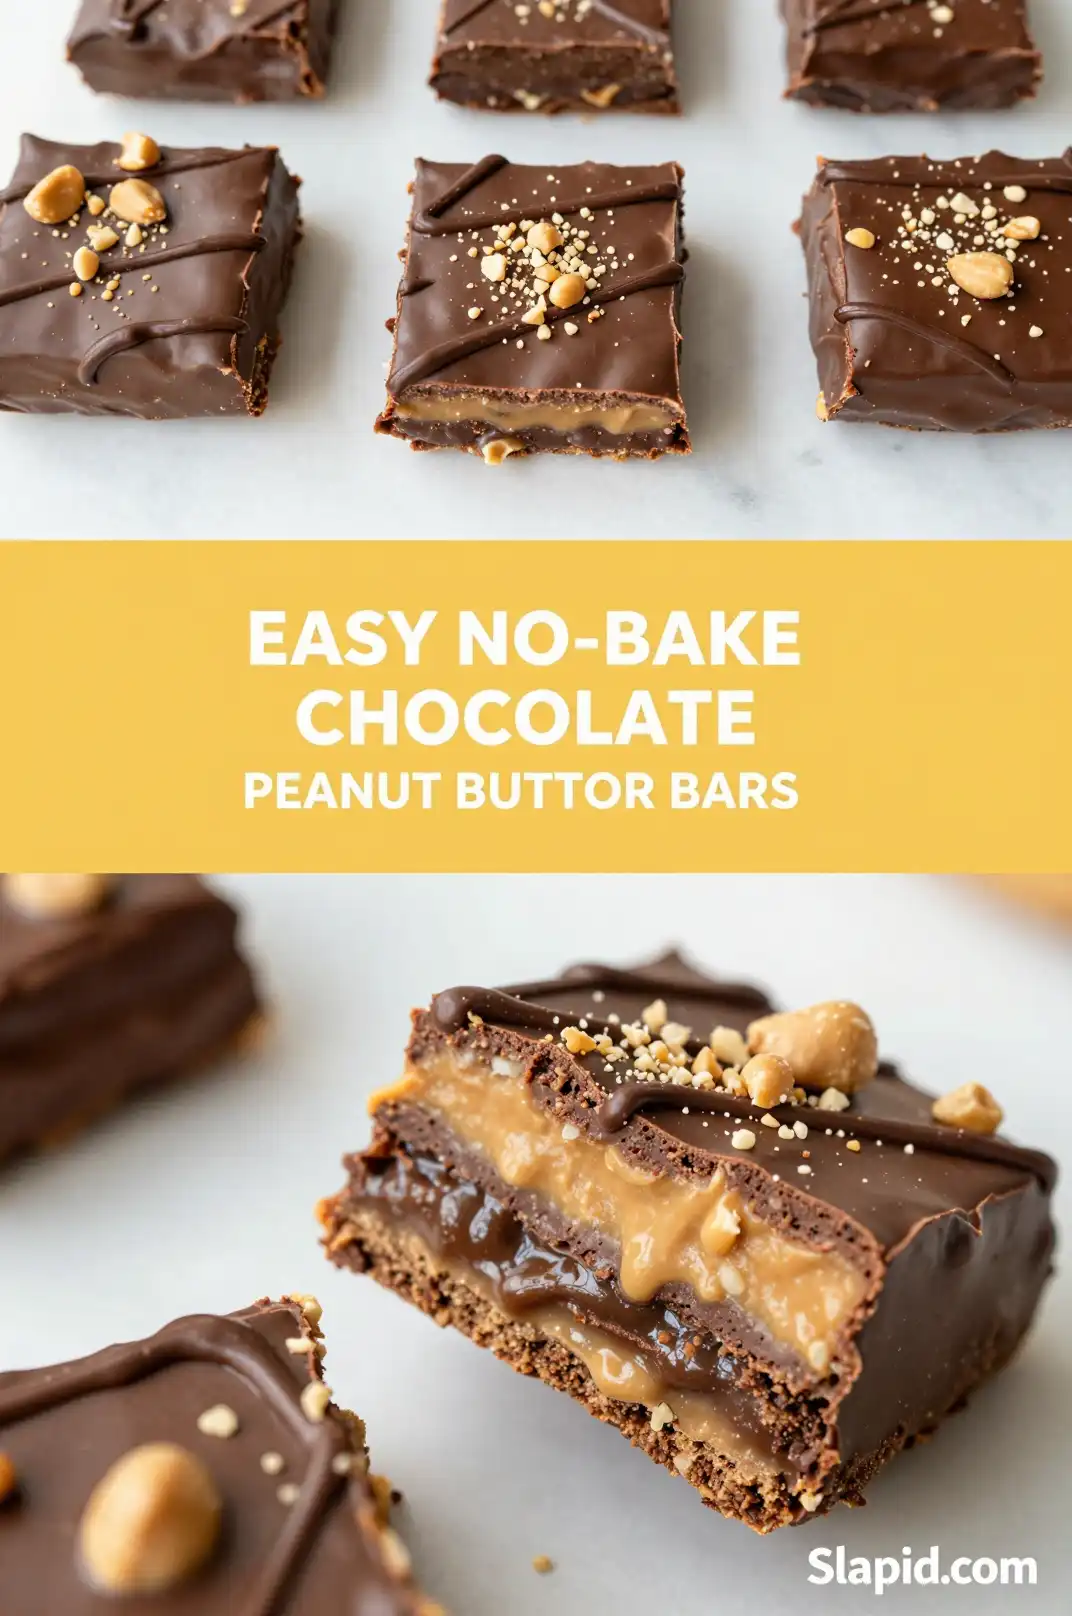
I remember the first time I made a batch. It was a Tuesday. A rainy, gray Tuesday that felt like a Monday in disguise. The peanut butter was so thick it threatened to defy gravity. The chocolate melted into a glossy, dark mirror. As I poured it over the waiting base, the scent—a warm, nutty hug followed by a wave of rich cocoa—filled the kitchen. The first bite? A revelation. A firm, nutty foundation giving way to a silky, cool chocolate top. It was over in seconds. The rain didn’t matter anymore.
Recommended Product
 -11%
-11%
8‑Piece Deep Glass Baking Dish Set with Plastic Lids (Rectangular Bakeware)
- Material: Oven, freezer & microwave safe borosilicate glass (goes from fridge/oven without cracking)
- Pieces →: 4 rectangular dishes + 4 tight‑fitting plastic lids (stackable)
- Easy Care →: Dishwasher safe glass & lids

Why This Recipe is Your New Best Friend
Forget complicated recipes with a million dishes. This is the culinary equivalent of a perfect pair of jeans—flattering, reliable, and makes you feel fantastic. The magic is in its beautiful simplicity. You’re not baking. You’re not waiting for anything to rise. You’re simply layering flavors and textures in a way that feels like a cheat code for dessert.
🍳 Used in this recipe
Get It on Amazon Basics✔ Free Delivery | ✔ Top Rated | ✔ Budget-FriendlyThe base is a sturdy, chewy concoction that holds its shape but never feels like a brick. It’s sweetened just enough to complement the natural saltiness of the peanut butter. Then, the topping: a cloud of melted chocolate that sets to a satisfying snap. It’s a textural playground. The base yields gently under your teeth, the chocolate cracks, and the whole thing dissolves into creamy, peanut-buttery bliss. It’s the kind of treat that makes you close your eyes. You can find this exact, foolproof formula on my blog at [slapid.com](https://slapid.com/recipes/easy-no-bake-chocolate-peanut-butter-bars/), where I’ve tested it with every brand of peanut butter under the sun.
The Peanut Butter Paradox: Why It’s More Than Just a Spread
Let’s talk about the star of the show. Peanut butter isn’t just a flavor; it’s a structural marvel. Its magic lies in the emulsion of fat and protein. When you mix it with powdered sugar and a bit of butter, you’re creating a dense, pliable paste. The powdered sugar provides sweetness and structure without making it gritty, unlike granulated sugar, which would create a sandy texture.
The fat in the peanut butter and butter coats the flour particles, preventing gluten development. This is crucial because, remember, we’re not baking! We need a base that sets firmly in the fridge, not one that bakes up airy. The type of peanut butter you use is your biggest variable. **Creamy, no-stir peanut butter** is the most reliable for a smooth, uniform base. If you’re using a natural peanut butter where the oil separates, you must stir it *thoroughly* before measuring. The ratio of oil to solids can change the final texture, making it more crumbly or softer. It’s a delicious science experiment in every jar.
🍳 Used in this recipe
Get It on Amazon Basics✔ Free Delivery | ✔ Top Rated | ✔ Budget-FriendlyLet’s Get Cooking: The Step-by-Step Symphony
This is less about following steps and more about creating a rhythm. You’ll need a standard 8×8 or 9×9 inch pan, and some parchment paper is your best ally for clean removal.
**The Foundation (The No-Bake Base)**
In a medium bowl, combine your creamy peanut butter, softened butter, powdered sugar, and a pinch of vanilla. The vanilla isn’t just for flavor; it rounds out the peanut butter’s earthiness. Use a sturdy spatula or your hands (lightly greased) to mix. You’re looking for a uniform, thick dough that pulls away from the sides of the bowl. Press this mixture firmly and evenly into your parchment-lined pan. The key here is **firm, even pressure**. Use the bottom of a flat glass or measuring cup to compact it. A loose base leads to a crumbly bar. Press it down like you mean it.
**The Crown (The Chocolate Topping)**
Now for the grand finale. In a microwave-safe bowl, combine your chocolate chips and a splash of coconut oil (or butter). The oil is the secret agent here—it ensures the chocolate melts smoothly and, once set, gives it a gorgeous shine and a perfect snap. Microwave in 30-second bursts, stirring vigorously after each, until it’s a glossy, molten pool. Pour this over your peanut butter base and use an offset spatula to spread it into a beautiful, even blanket.
🍳 Used in this recipe
Get It on Amazon Basics✔ Free Delivery | ✔ Top Rated | ✔ Budget-Friendly**The Patience (The Chill)**
Resist the urge to sneak a bite. This is the hardest part. Slide the pan into the refrigerator for at least 2-3 hours. The chocolate needs time to solidify, and the base needs to firm up completely. If you cut it too soon, you’ll have a delicious, messy puddle. Let the fridge do its quiet, powerful work.
How NOT to Mess This Up (A Cautionary Tale in Three Parts)
Even the simplest recipes have their pitfalls. Consider this your friendly warning.
1. **The Temperature Trap:** Using cold butter or cold peanut butter straight from the pantry is a recipe for a lumpy, unmixable base. Your butter should be soft enough to leave an indent when pressed, but not melting. If it’s too hard, you’ll be fighting it, and the sugar won’t incorporate smoothly. Let it sit on the counter for 20 minutes. Your patience will be rewarded.
2. **The Overzealous Chocolate Pour:** Pouring hot, freshly melted chocolate onto a cool base can sometimes cause the chocolate to seize or become grainy. Let the chocolate cool for just a minute or two off the heat. It should still be pourable but not scorching. A smooth pour equals a smooth finish.
3. **The Impatient Cut:** I’m looking at you, the person who tries to cut the bars after 30 minutes in the fridge. You’ll be scraping chocolate off the knife and creating a jagged mess. For clean, professional-looking bars, use a sharp knife dipped in hot water and wiped dry between cuts. The chocolate will slice like butter, revealing those perfect layers.
🍳 Used in this recipe
Get It on Amazon Basics✔ Free Delivery | ✔ Top Rated | ✔ Budget-FriendlyServing Vibes: Setting the Scene for a Sweet Moment
These bars are mood chameleons. They are the ultimate rainy-day companion, a small square of joy on a blanket fort movie night. They’re the hero of a potluck table, standing proudly next to fancier desserts, knowing their simple charm wins every time. They’re a midnight snack, a post-dinner reward, and a “I-made-it-just-for-you” gift.
Pair them with a cold glass of milk (dairy or oat) for the classic experience. For an adult twist, a strong black coffee or a shot of espresso cuts through the richness beautifully. They are not fussy. You can eat them straight from the fridge for a firm, cold bite, or let them sit for 10 minutes to soften slightly, making the base more fudgy. There’s no wrong way, only your way.
Recommended Product
 -15%
-15%
Silicone Baking Mat with Measurement Guide (Non-Stick Pastry & Cake Mat)
- Material →: Food-grade silicone (safe for baking)
- Surface →: Non-stick (no butter or oil needed)
- Design →: Measurement guide for perfect cake sizes
Recommended Product
 -33%
-33%
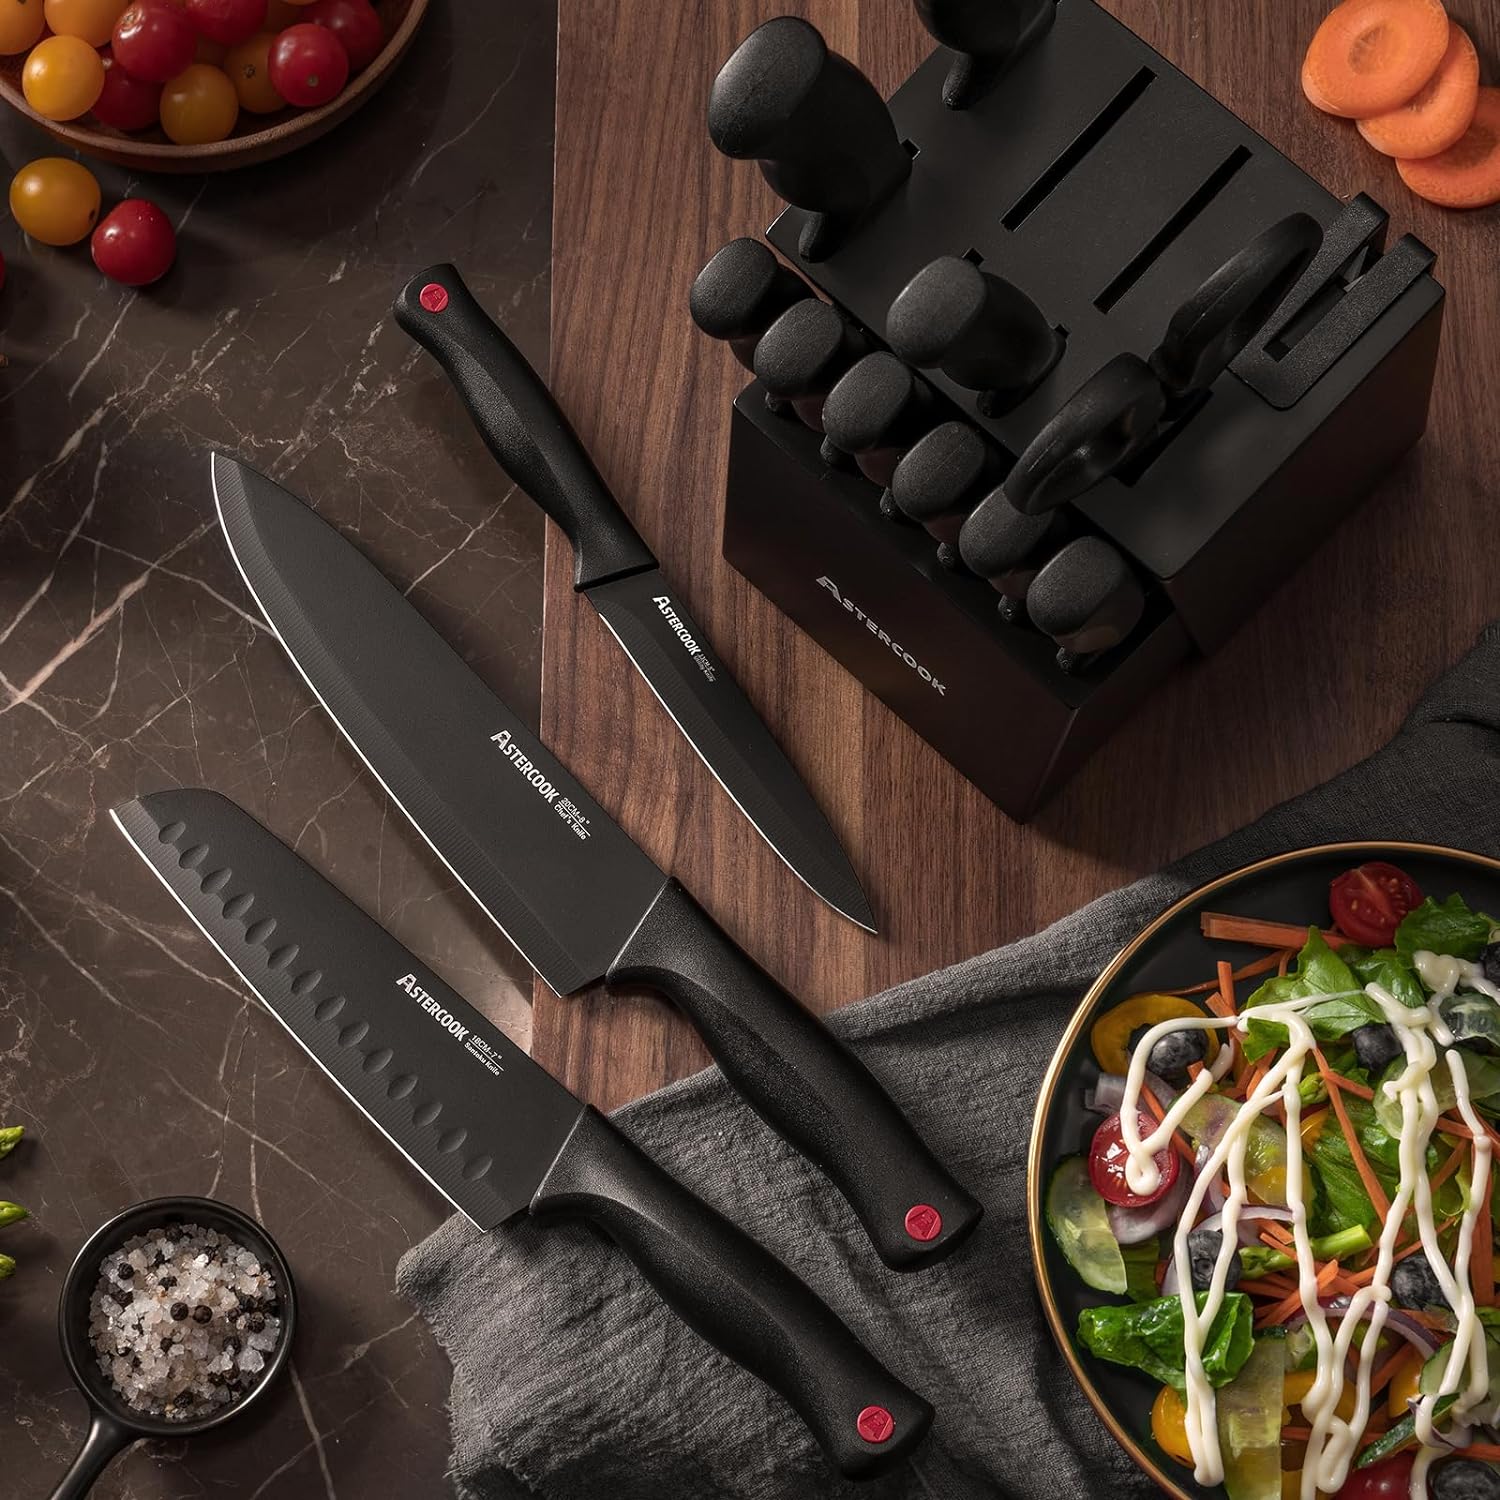
Astercook 15‑Piece Kitchen Knife Set with Built‑In Sharpener Block
- Built‑In Sharpener →: Integrated sharpener in block for easy maintenance
- Material →: High‑carbon German stainless steel blades (rust‑resistant, durable)
- Dishwasher Safe →: Yes (but hand washing recommended to preserve sharpness)
Leftovers? Here’s the Plan (AKA: The FAQ)
**How do I store these bars and keep them perfect?**
This is key to preserving that glorious texture. Store them in an airtight container in the refrigerator. Place a piece of parchment paper between layers if you need to stack them. They will keep their integrity for up to a week. The fridge is non-negotiable for keeping the chocolate firm and the base from getting too soft.
🍳 Used in this recipe
Get It on Amazon Basics✔ Free Delivery | ✔ Top Rated | ✔ Budget-Friendly**Can I freeze Easy No-Bake Chocolate Peanut Butter Bars?**
Absolutely! This is the best way to have a stash of happiness on demand. Once fully set and cut, you can freeze the bars individually on a baking sheet. Once solid, transfer them to a freezer-safe bag or container. They’ll keep for up to 3 months. To enjoy, thaw them in the refrigerator for a few hours. I wouldn’t recommend microwaving them, as the chocolate can overheat and the base can get too soft.
**What are the calories in Easy No-Bake Chocolate Peanut Butter Bars?**
Nutritional values can vary based on the specific brands of peanut butter, butter, and chocolate you use. A standard bar (assuming a recipe cut into 16 squares) typically lands in the 200-250 calorie range. They are a rich, decadent treat, so savor each bite! If you’re curious about the math for your specific ingredients, plugging them into a calculator like the one on the USDA website will give you the most accurate count.
**Can I make these with almond butter or sunflower seed butter?**
Yes, you can! For a peanut-free version, almond butter works beautifully. It has a slightly different flavor—more marzipan-like—and can be a bit thinner, so you might need a touch more powdered sugar to achieve the right dough consistency. Sunflower seed butter is another great option, but note that it can have a greenish tint when baked (or chilled) due to a reaction with baking soda; since we’re not baking, this shouldn’t be an issue, but the color might be a slightly earthy hue. The taste, however, is fantastic.
🍳 Used in this recipe
Get It on Amazon Basics✔ Free Delivery | ✔ Top Rated | ✔ Budget-Friendly**My chocolate topping isn’t setting smoothly. What went wrong?**
The most common culprit is humidity or a bit of steam getting into the chocolate as it melted. If your kitchen is very warm, the chocolate might take longer to firm up. Give it extra time in the fridge. If the texture seems off, you can gently re-melt it and try again, but sometimes a slightly softer set is just the result of a warmer kitchen. It will still taste incredible! For the best snap next time, ensure your bowl and utensils are completely dry before melting the chocolate.
Ready to conquer your sweet craving without breaking a sweat? Get the full, detailed recipe and start your no-bake adventure. Your future self, lounging on the couch with a perfect bar in hand, will thank you. **[Find the recipe here!](https://slapid.com/recipes/easy-no-bake-chocolate-peanut-butter-bars/)**

Easy No-Bake Chocolate Peanut Butter Bars
Ingredients
Ingredients
- 1 cup creamy peanut butter not natural style
- 1/2 cup unsalted butter melted
- 2 cups graham cracker crumbs about 12 full sheets
- 1 cup powdered sugar sifted
- 1 teaspoon vanilla extract
- 1 cup semi-sweet chocolate chips
- 2 tablespoons creamy peanut butter for topping
- 1/4 teaspoon salt optional, for topping