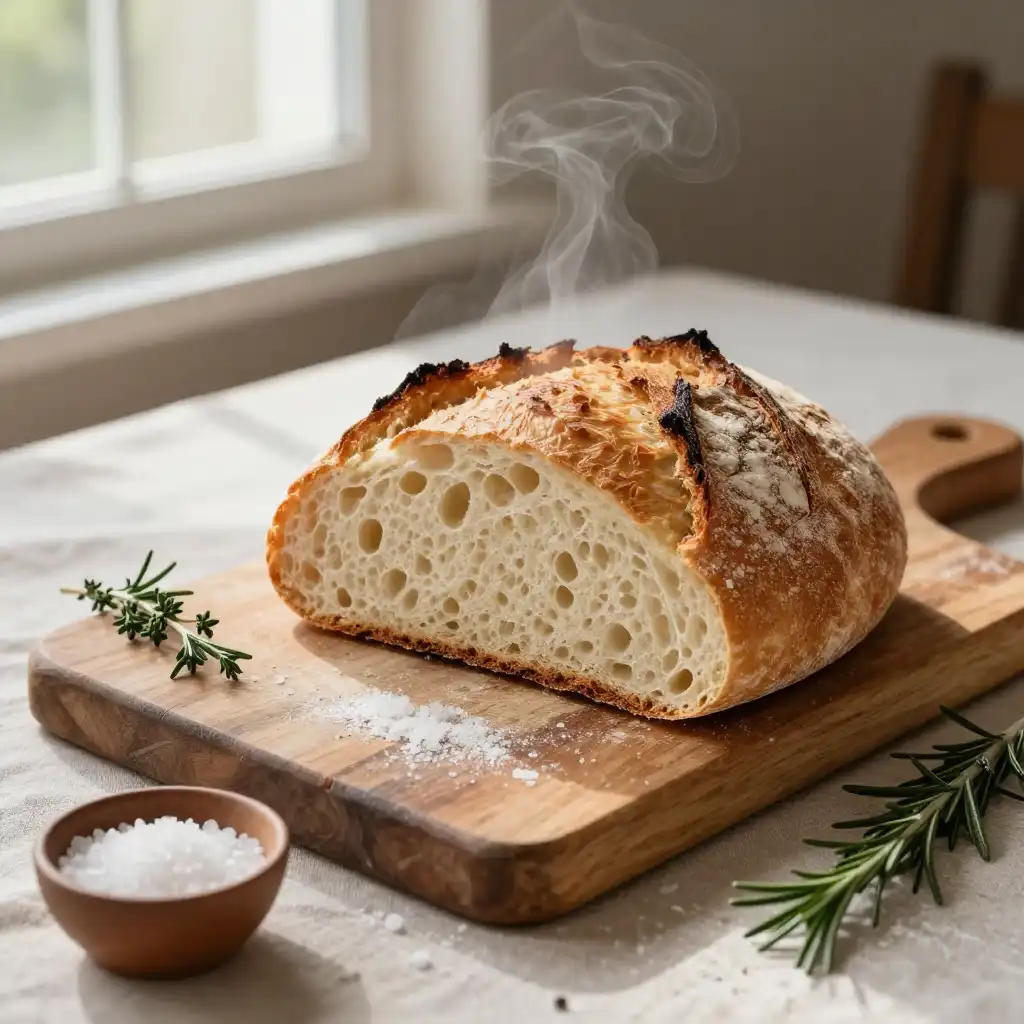
The Sound of a Perfect Crust
There’s a moment, right before the magic happens. It’s when you lift the lid of your Dutch oven, and the trapped steam escapes in a dramatic hiss, fogging up your glasses for a split second. You’re not just baking bread; you’re creating a tiny, personal weather system in your kitchen. The aroma hits you first—a deep, toasty, nutty scent that smells like warmth itself. Then you see it: that glorious, blistered, golden-brown dome, crackling with a symphony of tiny fissures. This isn’t just bread. This is an event.
Forget everything you think you know about baking. This isn’t some fussy, multi-day project requiring a degree in gluten science. This is the bread that makes you feel like a culinary wizard with minimal effort. The Dutch oven is your secret weapon, creating a steamy environment that mimics a professional bakery’s deck oven. The result? A crust that shatters like a delicate caramel shell and an interior so open and airy it feels like you’re tearing into a cloud. It’s the kind of bread that makes you cancel plans just to enjoy it with a pat of butter.
Recommended Product

What Your Pantry is Secretly Begging For
You likely have everything you need already. This recipe is built on simplicity and trust. The ingredient list is short, but each one plays a critical role. We’re not just throwing flour and water together; we’re building flavor from the ground up.
🍳 Used in this recipe
Get It on Amazon Basics✔ Free Delivery | ✔ Top Rated | ✔ Budget-FriendlyThe star, of course, is the flour. A sturdy bread flour gives this loaf its chew and structure, but all-purpose flour works beautifully too. It’s the canvas for everything that follows. Then, a whisper of instant yeast—not the kind you proof in water, just the dry stuff that gets straight to work. The salt is non-negotiable; it controls the yeast, strengthens the gluten, and, most importantly, makes the bread taste like something. And finally, the water. It’s the hydrator, the transformer, turning a shaggy mass into a cohesive, elastic dough. It’s all you need to create something extraordinary.
The Science of Letting Go (And Letting Time Work)
Here’s the beautiful secret: the kneading is already done for you. It’s just happening in slow motion. When you mix these few ingredients into a sticky, shaggy dough, you’re forming the initial gluten strands. But instead of spending 10 minutes on a counter working them into a smooth ball, you’re letting time do the heavy lifting. Over the next 12-18 hours, the yeast slowly ferments, releasing gases that get trapped in the developing gluten network.
This long, slow rise is where the deep, complex, slightly tangy flavor develops—flavor that a quick-rise dough simply can’t achieve. The gluten strands relax and organize themselves into a strong, elastic web. This is the science of no-knead: it’s not about force, it’s about patience. By the time you’re ready to bake, the dough has developed all the strength it needs on its own, resulting in that coveted open crumb. This is the same principle behind many incredible homemade bread recipes, like those you might find on [Pinterest’s search for no-knead techniques](https://www.pinterest.com/search/pins/?q=how%20to%20make%20easy%20no%20knead%20bread%20at%20home), where time is the key ingredient.
🍳 Used in this recipe
Get It on Amazon Basics✔ Free Delivery | ✔ Top Rated | ✔ Budget-FriendlyThe Art of the Dough: A Step-by-Step Guide
Ready to make some kitchen magic? This is the part where we turn those simple ingredients into the star of your table. Don’t overthink it. Trust the process.
Step 1: The Mix-Up
In a large bowl, whisk together your flour, instant yeast, and salt. Make a well in the center and pour in your room-temperature water. Use a wooden spoon or a spatula to mix until a shaggy, sticky dough forms. There should be no dry flour patches. It will look messy—this is perfect.
Step 2: The Long, Slow Nap
Cover the bowl with a damp kitchen towel or plastic wrap. Find a warm, draft-free spot in your kitchen and let it rest. Walk away. Go live your life. Let the dough do its thing for 12 to 18 hours. You’ll know it’s ready when it’s bubbly, more than doubled in size, and the surface is dotted with tiny fermentation bubbles.
🍳 Used in this recipe
Get It on Amazon Basics✔ Free Delivery | ✔ Top Rated | ✔ Budget-FriendlyStep 3: The Gentle Shaping
Turn the dough out onto a well-floured surface. It will be loose and sticky—this is good! With floured hands, gently fold the dough over itself a few times to create a rough shape. Then, let it rest for 15 minutes. After that, shape it into a tight, round ball. Place it on a piece of parchment paper, seam-side down.
Step 4: The Dutch Oven Pre-Show
Place your Dutch oven with its lid on into your oven. Preheat everything to 450°F (230°C). This is crucial. You need the pot screaming hot to create that instant steam and oven spring. Let it preheat for at least 30 minutes.
Step 5: The Big Score
Carefully remove the blazing-hot Dutch oven. Using the parchment paper as a sling, lower your dough ball into the pot. Using a sharp knife or razor blade, score the top of the dough with a simple slash or an “X”. This allows steam to escape in a controlled way and gives you that professional, artisan look.
🍳 Used in this recipe
Get It on Amazon Basics✔ Free Delivery | ✔ Top Rated | ✔ Budget-FriendlyStep 6: The Bake and The Reveal
Cover with the lid and bake for 30 minutes. Then, carefully remove the lid and bake for another 15-20 minutes until the crust is a deep, gorgeous golden brown. The internal temperature should reach about 210°F. Lift it out using the parchment sling and let it cool on a wire rack for at least an hour. The cooling is part of the baking process; it finishes cooking the interior. The crackling sound is your victory anthem.
How Not to Screw This Up (A Public Service Announcement)
This recipe is forgiving, but a few missteps can lead to a dense loaf. Let’s avoid that, shall we?
**The Sticky Situation:** If your dough feels too wet and sticky to handle, resist the urge to add a mountain of flour. This dough is *supposed* to be sticky. A wet dough is the key to an open crumb. Simply use wet hands or a bench scraper to handle it during shaping.
🍳 Used in this recipe
Get It on Amazon Basics✔ Free Delivery | ✔ Top Rated | ✔ Budget-Friendly**The Patience Game:** If you skimp on the rise time, you’ll get a flat, flavorless pancake. The 12-18 hour fermentation is where the magic happens. If your kitchen is cold, give it a few extra hours. Look for the visual cues: doubled size, bubbly surface. It’s ready when it looks ready, not necessarily when the clock says so.
**The Scalding Hot Pot:** Never, ever place a cold dough into a cold Dutch oven. The shock will ruin your oven spring. You must preheat the pot with the oven. Use thick oven mitts, and be careful—the pot is a furnace. The parchment paper sling is your best friend here.
**The Cooling Patience:** I know it’s tempting. The smell is intoxicating, and you want to tear into it immediately. Don’t. Cutting into hot bread traps steam inside, making the crumb gummy and dense. Let it cool completely on a rack. This is the hardest part, but it’s essential for the perfect texture.
🍳 Used in this recipe
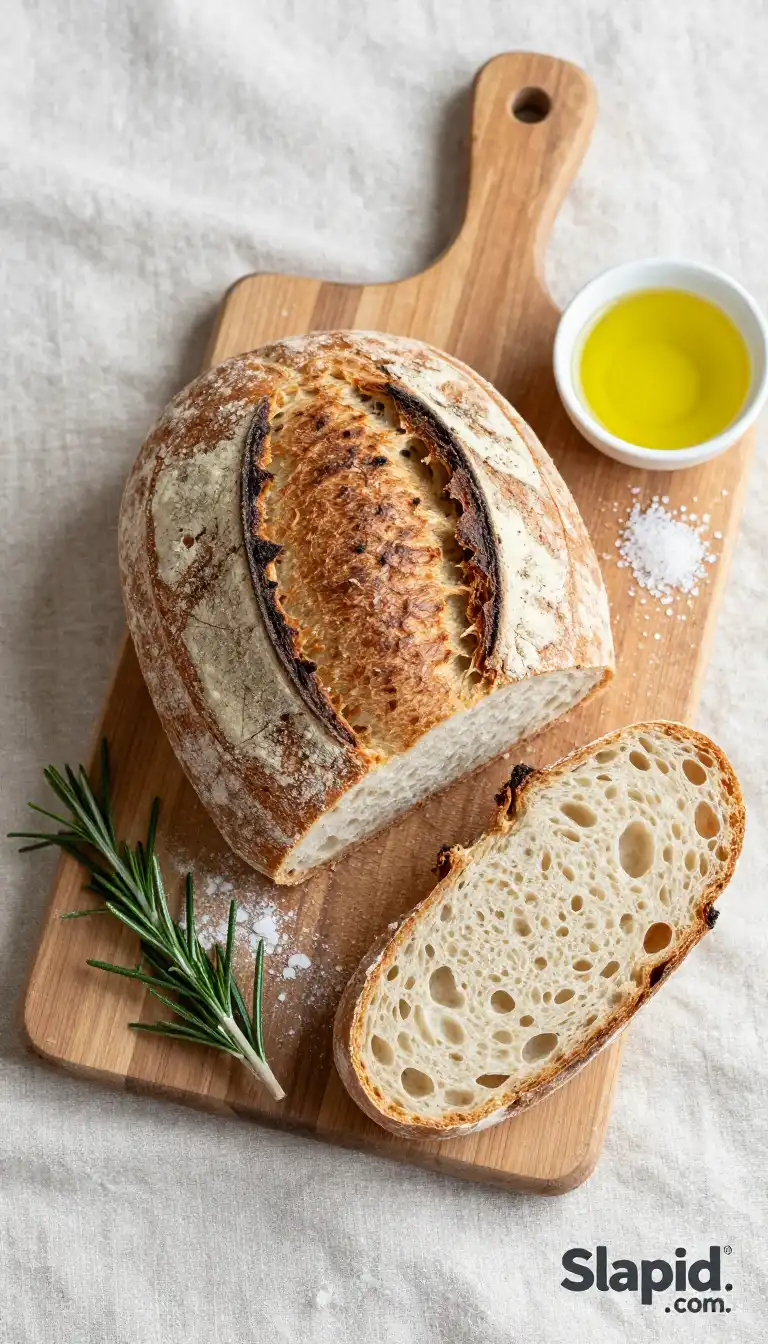
Get It on Amazon Basics✔ Free Delivery | ✔ Top Rated | ✔ Budget-FriendlyServing Vibes: Setting the Scene
This bread is a chameleon. It fits any mood.
**The Cozy Rainy Day:** Slice thick, rustic pieces. Slather with creamy butter and a drizzle of honey. Pair with a steaming bowl of tomato soup. The crust is your utensil for scooping. It’s comfort in carb form.
**The Effortless Dinner Party:** This is your showstopper. Tear it apart and place it in a basket in the center of the table. It becomes an interactive, communal experience. Serve alongside a vibrant salad, a charcuterie board (with all the non-pork, non-alcohol fixings, of course), or a hearty stew.
🍳 Used in this recipe
Get It on Amazon Basics✔ Free Delivery | ✔ Top Rated | ✔ Budget-FriendlyRecommended Product

Amazon Basics Silicone Baking Mat (2-Pack Non-Stick Oven Liners)
- Material →: Food-safe silicone, reusable thousands of times
- Non-Stick →: No butter, oil, or parchment needed
**The Morning Glory:** Leftover slices (if there are any) make the world’s best toast. Top with smashed avocado, a sprinkle of flaky salt, and red pepper flakes. The crunch of the toasted crust against the creamy avocado is a revelation.
Bread FAQs: Your Burning Questions, Answered
How do I freeze Easy No-Knead Artisan Dutch Oven Bread?
This bread freezes beautifully! For best results, slice it first. Let the loaf cool completely, then slice it. Place the slices in a single layer on a baking sheet and freeze until solid. Transfer the frozen slices to a freezer bag. This prevents them from sticking together. To enjoy, pop a frozen slice directly into your toaster. The crust will get wonderfully crisp again. You can also freeze the whole loaf, wrapped tightly in plastic wrap and then foil, for up to 3 months.
What are the calories in Easy No-Knead Artisan Dutch Oven Bread?
This depends on the exact size of your loaf and slice thickness. A typical slice (1/12th of a standard loaf) made with all-purpose flour contains roughly 120-150 calories. It’s primarily carbohydrates with a small amount of protein. This bread is wonderfully satisfying, so one or two slices often feel plenty, especially when enjoyed with healthy fats like avocado or nut butter.
🍳 Used in this recipe
Get It on Amazon Basics✔ Free Delivery | ✔ Top Rated | ✔ Budget-FriendlyCan I use active dry yeast instead of instant yeast?
You can, but it requires a small adjustment. Active dry yeast needs to be activated first. Mix it with a portion of the warm water and a pinch of sugar from the recipe, and let it sit for 5-10 minutes until it becomes foamy. Then, proceed with the recipe as written. Instant yeast is simpler because it can be mixed directly with the dry ingredients. The rise time might be slightly shorter with instant yeast.
My dough didn’t rise much. What went wrong?
There are a few culprits. The most common is expired yeast. Check your yeast’s expiration date! Another possibility is your water temperature was too hot (killing the yeast) or too cold (slowing it down drastically). Room temperature is ideal. Finally, if your kitchen is very cool, the rise can take much longer—give it time and look for the visual cues of doubling in size.
Recommended Product
 -11%
-11%
8‑Piece Deep Glass Baking Dish Set with Plastic Lids (Rectangular Bakeware)
- Material: Oven, freezer & microwave safe borosilicate glass (goes from fridge/oven without cracking)
- Pieces →: 4 rectangular dishes + 4 tight‑fitting plastic lids (stackable)
- Easy Care →: Dishwasher safe glass & lids
Do I need a Dutch oven specifically?
While a Dutch oven creates the ideal steamy environment, you can simulate it. A heavy, oven-safe pot with a tight-fitting lid will work. Alternatively, place a baking stone or steel in your oven to preheat, place your dough (on parchment) onto it, and immediately cover with a metal bowl or a second inverted baking sheet. The key is trapping steam. For the absolute best crust and oven spring, the cast iron Dutch oven is unbeatable. It’s a worthy investment for any bread baker.
🍳 Used in this recipe
Get It on Amazon Basics✔ Free Delivery | ✔ Top Rated | ✔ Budget-FriendlyReady to start your bread journey? You can find the full, detailed recipe for this incredible loaf at this link: [Easy No-Knead Artisan Dutch Oven Bread Recipe](https://slapid.com/recipes/easy-no-knead-artisan-dutch-oven-bread-recipe/). Now, go preheat that oven. Your kitchen is about to smell amazing.

Easy No-Knead Artisan Dutch Oven Bread
Ingredients
Ingredients
- 3 cups all-purpose flour plus more for dusting
- 1.5 tsp fine sea salt or kosher salt
- 0.25 tsp instant yeast or active dry yeast
- 1.5 cups warm water about 100°F (38°C)